Showing posts with label cake. Show all posts

Thursday, August 19, 2010

Something Fresh is Coming...

I'm looking forward to sharing my thoughts on Rudi's Organic Bakery products with you early next week. At that time, you can enter to win one of five free Rudi's Organic products! That's right! Five winners! See you soon!


Meanwhile, check out my recipe for Fresh Strawberry Cake with Cream Cheese Icing. It's what Picky Eater chose for her birthday dinner dessert. Yep, today was Picky Eater's seventh birthday. She opted for bacon, sausage, eggs, and toast for dinner, with strawberry cake for dessert. Good choices all around. Here's the birthday girl this morning:

Sunday, August 15, 2010

BUTTERFLIES IN MY TUMMY


My baby turns seven this week. She is the most amazing little human I've ever known: compassionate, helpful, caring, kind, conscientious, loyal, devoted, loving, smart, talented, beautiful, friendly, approachable, and loved by all. She has no foes, rivals, or enemies. She is just as beautiful on the inside as she is on the outside.

She is a joy to parent. She has thrown one tantrum in her entire life. She's had to be scolded fewer times than I have fingers. She genuinely cares about everyone she meets, and always looks for ways to help. She has super self-esteem but is never boastful of herself. I am so honored to call her my daughter.

And she turns seven years old this week.

Birthdays are a bittersweet marking of time with my Little One. She professes that she's never moving out -- she always wants to stay with her parents. We struck a deal and offered to build a house on the back side of our property when we are ready to retire from the Army. She likes this idea. Such a sweet daughter.

Anyway, I'm daydreaming. On with this post.

Birthdays -- yes, they're bittersweet. Before I can blink my eyes, she'll be sixteen and asking for the keys to Daddy's car. And I'll be welling up with tears just as real as I am this week, as my sweet daughter, who has four wiggly teeth and has recently discovered modesty, turns seven years old.

There will be much celebration to mark this event. Aside from our intimate family acknowledgement of her actual birthday, there's her class party and a birthday party with friends to look forward to. We had a small party with Grandma Kathy yesterday. She was in town and we wanted to celebrate together, so I threw together this simply ice cream cake. It's not wholesome and pure. But it's a hit with all who taste it, so I'm going off the beaten path and sharing this simple recipe with you. Pull it out of your hat for your next cookout, church potluck, or friendly get-together.

Ice Cream Sandwich Cake
makes a 10" square cake

What You Need:
  • 18 or so ice cream sandwiches, unwrapped
  • 1 to 2 cups whipped topping
  • hot fudge sauce (or caramel, or whatever you prefer)
  • sprinkles, nuts, crushed cookies, or candy
How it's Done:
  1. Lay the ice cream sandwiches side-by-side in one layer of a 10" square baking dish. You'll have to cut one or two of them up to fit in the remaining spots.
  2. Cover with a thin layer of whipped cream.
  3. Repeat another layer of ice cream sandwiches, and over with whipped cream again.
  4. Drizzle sauce over whipped cream. Sprinkle with desired toppings.
  5. Return to the freezer and let it freeze two hours. Remove from freezer and let the cake stand at room temperature for 20 minutes before slicing and serving.

Saturday, July 24, 2010

It's Almost Back to School Time

..which means it's almost back to packing lunches. What will you send to school? If you're like me, you'll be packing lunch. And, if you're like me, you'll be wanting some variety in your daily packing. One of my favorite ways to ensure variety in my children's lunches is by cooking ahead and freezing individual portions. Little sweets freeze well, and allow you to dole them out every now and then...a sort of unexpected happy ending to a wholesome homemade lunch.

I'd like to invite you to follow my lunchbox journey this school year, which I'll chronicle at my new blog, 360 Lunch Boxes (pardon the layout changes while I find a look that suits me). Between now and the start of school, I'll be posting some how-to guidelines using some of my favorite new tools to make lunches more exciting. Once school begins, I'll be posting my kids' (and husband's, sometimes) lunchboxes with instructions when appropriate. I hope to expand my repertoire and inspire others to move beyond the square-shaped PBJ.

For us, school begins in less than two weeks. Because it's creeping up on me, I'm starting my preparations now. Today, I'm baking tiny maple cupcakes. These freeze very well. Popping a frozen cupcake into a lunchbox keeps it fresh and stable until lunchtime. Using a mini variety and all-natural ingredients makes me feel good about sending this bite-sized treat to school with my girls. I hope you enjoy it.

Mini Maple Cupcakes with Honey Butter Frosting
(cupcakes gently adapted from this recipe at Baking Bites)

What You Need:

for the Mini Maple Cupcakes:
  • 1/2 cup sweet cream butter, at room temperature
  • 2/3 cup sugar (try maple sugar in these!)
  • 2/3 cup pure maple syrup (grade B is best)
  • 2 eggs
  • 1/3 cup milk (I used unsweetened vanilla almond milk)
  • 1 tsp vinegar (I used apple cider vinegar)
  • 2 tsp vanilla extract (you can make your own like me!)
  • 1 1/2 cups all-purpose flour
  • 1 tsp baking powder
  • 1/2 tsp fine sea salt
for the Honey Butter Frosting:
  • 1 cup sweet cream butter at room temperature
  • 1/2 cup honey
  • 4 tsp 5 cups confectioner's sugar
How it's Done:
  1. Preheat the oven to 350 degrees and line 36 mini muffin cups with papers. Stir together in a small bowl the milk and vinegar. Set aside. In a separate bowl, stir together the flour, baking powder, and salt, and set it to the side.
  2. Beat the butter on medium speed until light, about 30 seconds. Add the sugar and beat again. When the sugar's all incorporated, slowly pour in the maple syrup with the beaters going at medium speed.
  3. Add the eggs, one at a time, beating well after each addition. Then, add the vanilla extract.
  4. Pour the now curdled milk into the mixing bowl and beat again to combine.
  5. Slowly add your flour mixture with beaters on medium-low speed until all the flour has been added. Turn up the mixer to medium-high and beat for two minutes.
  6. Pour the batter into the prepared cupcake cups. Fill them almost completely.
  7. Bake ten to twelve minutes. Let the cupcakes cool completely before frosting.
  8. To make the frosting, beat the butter and honey on medium-high until creamy and smooth.
  9. Slowly add the confectioner's sugar, scraping sides as needed. Beat until the desired consistency is met.


Baker's tip: Have everything ready to go before the beaters hit the batter. Now, I don't have any of those cute prep dish sets (but boy, do I want them!), so I use what's on hand. But having everything ready to go -- pans greased, ingredients measured, oven preheated -- helps keep me on task. A side benefit is never realizing halfway through a recipe that you're missing a key ingredient. Take a moment and do your prep work. It's worth the effort.

Friday, June 18, 2010

Nicknames and Dogs

Day 169.

How many names does your dog (cat, ferret, gerbil, toad, parrot, gecko, turtle) have?

My Chihuahua's name is Diego. But he answers to Diego, Digger, Digger Do, Lil Cheech, Yowie Wowie, Angel Food Cake, Do Dah Day, and Pound Cake.

Pound Cake was a result of weight gain, so we could no longer call him Angel Food Cake. He gets called Pound Cake when his weight is too high, and Angel Food Cake when he loses his exess. And sometimes he gets called Angel Pound Cake.

He was a stray, too, so Pound Cake has a dual meaning.

Today, I was puttering in the kitchen, trying to decide on a dessert for tonight. I decided to make a pound cake. I told my husband.

And Diego came running.

Does anyone else give their pets more than one name, or is it just my nutty crew?

Enjoy dessert!

Chocolate Pecan Pound Cake

What You Need:
  • 1 cup pecan halves
  • 1 cup unsalted sweet cream butter at room temperature
  • 3 cups granulated sugar
  • 6 large eggs
  • 2 tsp vanilla extract
  • 3 cups all-purpose flour
  • 1 tsp baking powder
  • 6 Tbsp unsweetened cocoa powder
  • 1/2 tsp sea salt
  • 1 cup plain yogurt (full fat is better for the cake, but use what you have)
How it's Done:
  1. Grease and flour a Bundt pan. Sprinkle the pecans evenly over the bottom of the pan. Preheat the oven to 300 degrees.
  2. Stir together the flour, baking powder, cocoa, and salt. Set aside.
  3. Cream together the butter and sugar.
  4. Add the eggs, one at a time, beating well in between additions. Add the vanilla extract.
  5. Now, alternate adding in the yogurt and the flour mixture. Beat well, scraping the bowl down as you do.
  6. Pour batter over the nuts in the Bundt pan.
  7. Bake until a toothpick inserted near center comes out clean. This can take anywhere from 70 to 90 minutes.
  8. Let the cake cool in the pan for 15 minutes or so before inverting onto a plate.
  9. If desired, sprinkle with powdered sugar, or make a glaze with milk and powdered sugar to drizzle on top.

Thursday, May 20, 2010

When Just a Bit Will Do


Day 140.

Picky Eater is in a musical today with her gifted class at school. She's worked so hard since January on this and my husband and I are so proud of her. She's been belting out tunes from the production all year, practicing enunciating her line and all of the songs, doing her choreographed moves throughout the house. I can't wait to see it all come together tonight. She plays a Celtic woman. :)

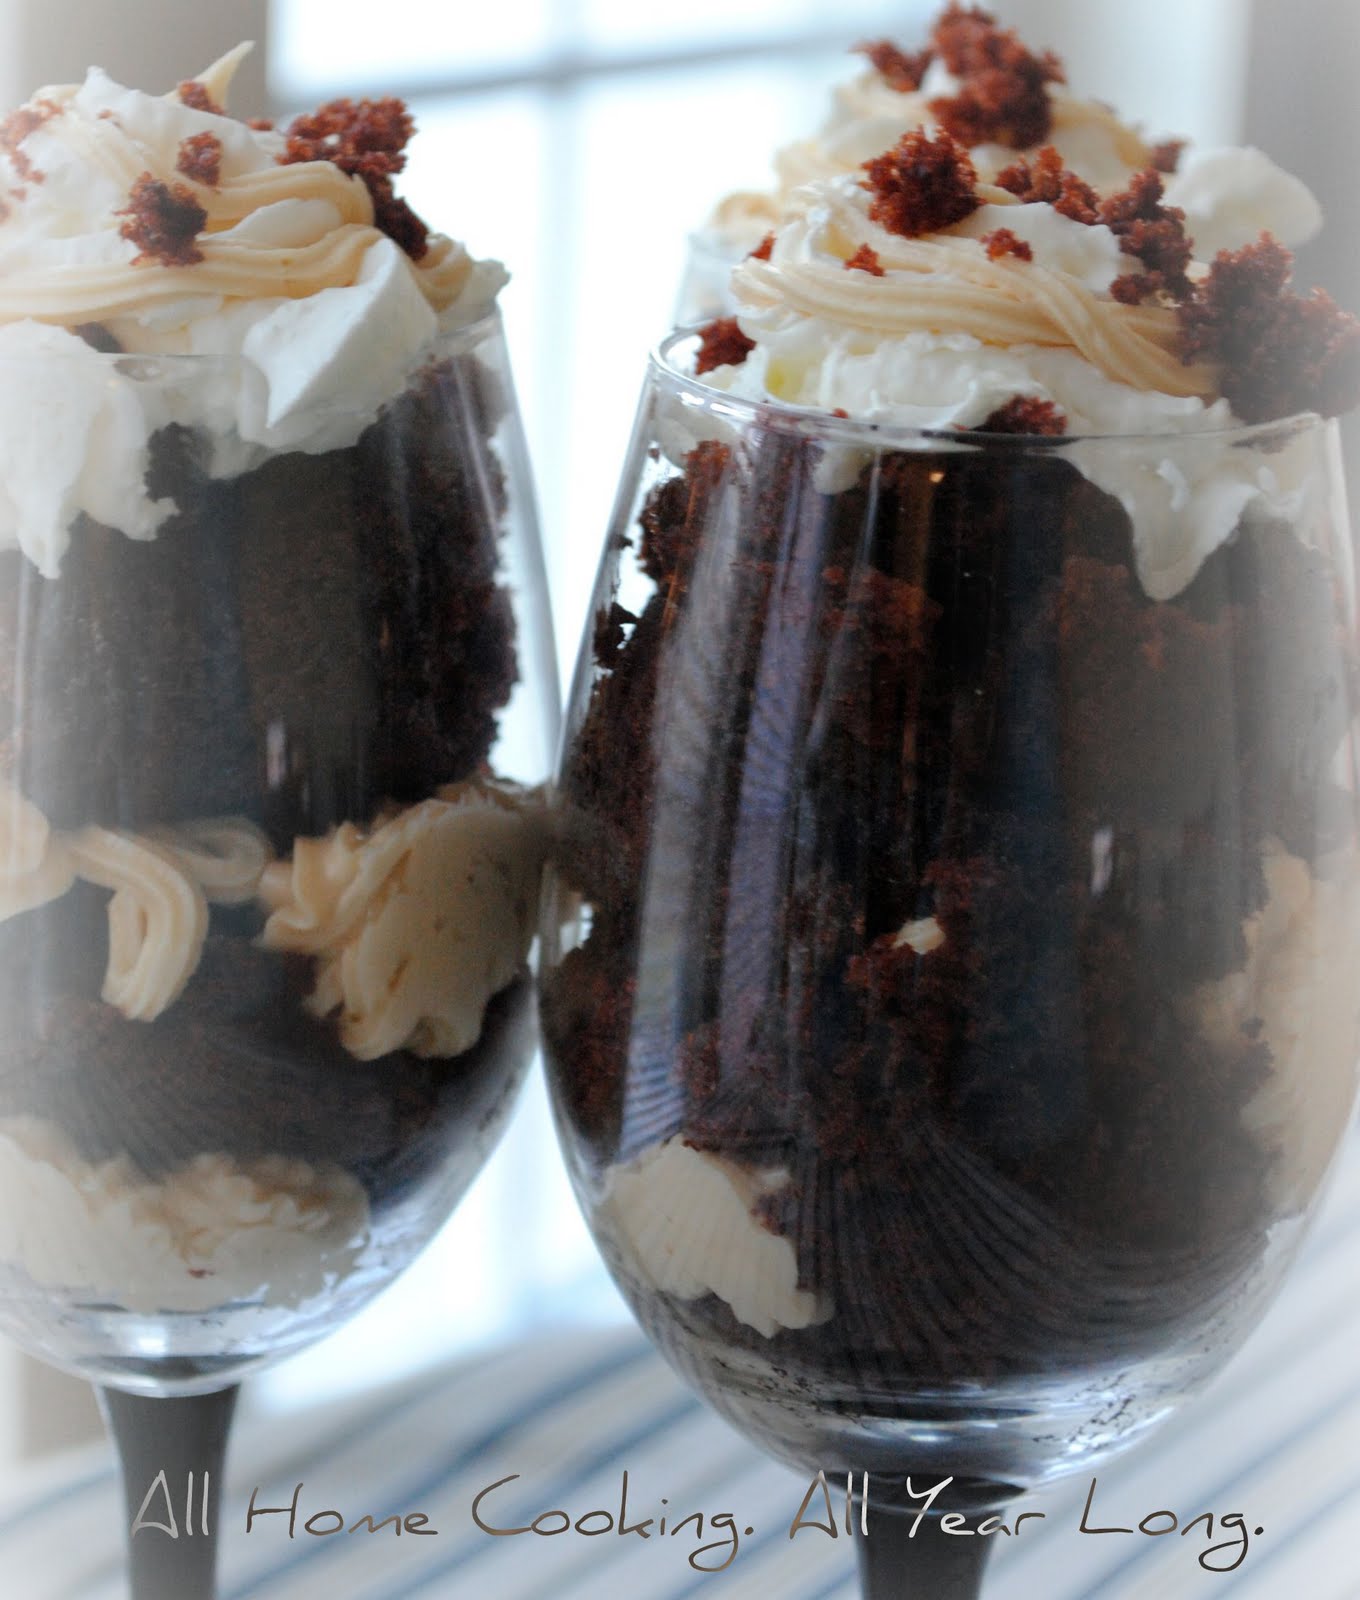
To celebrate, her daddy is picking up flowers and I am making a special dessert: individual trifles. It's just the four of us, and one of us can't eat cake. Not wanting a bunch of leftovers sitting around begging to be eaten, I made this recipe. It makes a small loaf cake (or you could use it to make cupcakes or a single 8" round cake). Perfect for my purposes. Perfect for a small family celebration.

Small Recipe Chocolate Cake

What You Need:
  • 1 cup all-purpose flour
  • 1 cup granulated sugar
  • 1/4 cup unsweetened cocoa powder
  • 3/4 tsp baking soda
  • 3/4 tsp baking powder
  • dash of salt
  • 1 egg
  • 1/2 cup milk
  • 1/4 cup oil
  • 1 tsp vanilla extract
  • 1/2 cup hot water
How it's Done:
  1. Combine flour, sugar, cocoa, baking soda, baking powder, and salt in a large mixing bowl.
  2. In a separate bowl, whisk together egg, milk, oil, and vanilla. Add all at once to dry ingredients and whisk briskly for 2 minutes.
  3. Pour hot water into batter and stir to combine.
  4. Pour into a greased 9x5" loaf pan and bake at 350 for 20 minutes.
I used this recipe to make peanut butter cup trifles. Layers of peanut butter frosting, chocolate cake, and whipped cream. Decadent. :o)

Monday, May 10, 2010

The Many Degrees of Yum

Day 130.

When eating, there are many stages of deliciousness that one can experience. They look like this:

Degrees of Yum

Stage One: Yuck. I can't believe my taste buds! This is the most disgusting thing I've ever eaten! I can't bring myself to take another bite. I will never, ever eat this again. I need water. Quickly.

Stage Two: This is not very tasty. It's not worth spending my appetite on. It's not the worst thing ever, but burnt toast tastes better than this. I'm putting my fork down and looking for something better to eat.

Stage Three: Well, it's not terrible, but it's not great, either. If it means not hurting someone's feelings, I can bare to eat the rest of this. If it's all that's available, it's fine. I'll eat it. It wouldn't be my go-to dining option, but it's food, and I'm hungry.

Stage Four: This isn't bad at all! Could use something...maybe some salt, or a sauce, but this dish has potential. I will definitely eat this again, perhaps with some revisions to the recipe.

Stage Five: Wow! Now THIS is tasty. Whoever came up with this dish was a genius! I wonder if they'll share their recipe with me. I must have this dish again! I can't imagine going through my life without having had this dish at least one more time, and I'm going to recommend this dish to all my friends. Yum! There's a party in my tummy!

Stage Six: THIS dish is so good that I can't help but gobble it up as quickly as I can possibly choke it down! I can't believe I've never had this before! Where was I? Where was this dish? It's so good that I want seconds. And thirds. Can I bring some home with me? Hey, you over there! You have GOT to try this. It's amazing!

Stage Seven: The elusive stage seven. I suspect many people go through life having never reached this level of culinary ecstasy. At stage seven, nothing else exists but me and the dish. All movement in the room has ceased. There are no sounds except the sound of angels singing. I am beyond shoveling, for shoveling wouldn't do this dish justice. No, this is a dish best savored slowly. Very slowly. Let your lips feel it. Let your tongue feel it. Smell it. Taste it. Slowly. Eat it very, very slowly. Enjoy every morsel of this heavenly delight. This is the most delicious dish I've had in a long, long time. It's so good that it brings tears to my eyes. It's so good that I can't adequately describe it. It's so good that all I can do is enjoy it and gush over it, and I think about it for hours, days, weeks, and months after I experience it. It's so good that continuing to describe Stage Seven is pointless. One must experience Stage Seven to understand. Allow me to help you get there.

The Most Delicious Chocolate Cake. Ever. (a.k.a. Flourless Chocolate Cake)
adapted from Whole Foods

What You Need:
  • 2 cups dark chocolate chips, divided (1 1/3 cup for the cake, 2/3 cup for the icing) (the recipe calls for bittersweet, but to be honest, I don't know the difference and bittersweet was twice the cost)
  • 2 sticks of butter (plus 3 Tbsp later for the icing)
  • 1 1/2 cups granulated sugar (recipe calls for 1 1/4 but I used 1 1/2 accidentally and it was fabulous)
  • 6 large eggs
  • 1 cup unsweetened cocoa powder
  • 1 Tbsp milk
  • 1 Tbsp plus 2 tsp honey (recipe calls for 1 Tbsp but I found it needed more)
  • 1/2 tsp vanilla extract (recipe calls for 1/4 tsp, but again, I thought more was better)


How it's Done:
  1. Preheat your oven to 375 degrees. Spray a 9" spring form pan with non-stick cooking spray. The recipe calls for us to line our pan bottom with parchment, but a.) I didn't have any, b.) I am trying to use less stuff that goes in the garbage, and c.) I like to keep things cheap and simple when possible, so I didn't use it.
  2. In the microwave (or in a double boiler, your choice), melt the 1 1/3 cups chocolate chips with the cup of butter. Do this 30 seconds at a time, stirring between each go, just until the chips are almost melted. Then stir briskly to finish the job.
  3. Stir in the sugar.
  4. Add in the eggs, one at a time, whisking well between additions. Make sure all the whites are incorporated well.
  5. Sift the cocoa powder into the batter. I don't have a sifter, so I used a colander instead and it worked wonderfully. I just tapped the side. I did it a little at a time, stirring now and then to get the cocoa mixed in well.
  6. Pour the batter into the prepared pan. Bake for 30 to 40 minutes, until the middle is just set. Remove from oven and allow the cake to cool for ten minutes.
  7. Carefully remove the sides from the pan and invert the cake onto a cake plate or stand. Allow the cake to cool completely.
  8. Now, prepare the icing. Melt the remaining 2/3 cup chips with the 3 Tbsp butter. Stir in the milk, honey, and vanilla.
  9. Pour the icing onto the cake, and, using a flat spatula, spread it over the entire top and down the sides of the cake.
  10. Let the cake sit a while to firm up. The recipe says to refrigerate it for a while, and you can, if you last that long.
  11. Savor it. Slowly.
  12. Put the rest in the fridge for later. :)

Thursday, April 8, 2010

Happy Birthday to My Husband!

Day 98.

Reminder: Enter to win my very first giveaway! I'll choose a winner via Random.org on Saturday night!

In our household, on your birthday, you get to choose what's made for dinner and you get to create your own combination birthday cake. I'll make any cake flavor you want, use any filling(s) you want, and use your choice of frostings and decorations. You can even pick the shape if you'd like.

My husband's birthday was this past Monday. He's such an awesome guy: a hard worker, a devoted husband and father, fun-loving, sentimental, easy-going, and kind. I'm blessed to have him. :)

For his cake, he opted for white wedding cake, lemon filling, and cream cheese frosting. I wouldn't normally put those three together. White cake usually goes well with light, fluffy frosting. Lemon and cream cheese do pair well, but on a cake? Anyway, it was his choice, so I made it.

White cake can be very dry if you're not careful with your ingredients, your mixing, and your baking. This recipe from Martha Stewart came out very moist and light, but was dry by the next day. If you're going to make it, make it the same day you intend to serve it, if at all possible. Otherwise, bake it, cool it, and freeze it right away. Take it out of the freezer when you need it. That will help the cake retain its moisture.

For this cream cheese frosting, I combined:

  • 8 oz softened cream cheese (always use full fat, not low fat)
  • 1/2 cup softened butter
  • 1 3/4 lb confectioner's sugar
  • 1 Tbsp vanilla extract
  • milk to thin to the proper consistancy (use a tablespoon at a time)
First, I beat the butter and cheese on medium speed for 30 seconds. Then, I add the sugar slowly, scraping the sides of the bowl frequently. I then add the vanilla, and lastly the milk, beating to the right spreading consistancy.

Because my in-laws were in town, I cheated with a canned lemon pie filling, but a lemon curd would have been so nice. I wish I'd had the time.

Monday, February 22, 2010

My Grammy's Blueberry Coffee Cake


This is so good. I had this coffee cake growing up and called my Grammy today to get the recipe. She also made it with cranberries -- equally delicious. This is at least its third generation. My mother made it, and now I'm making it.

And NOW, you can make it too. When you make it, and people ooh and ahh over it and ask where you got the recipe, tell them it's Home Cookin' Michelle's Grammy's recipe.


Blueberry Coffee Cake
makes a 10" square cake


Ingredients:

For the cake:

  • 2 cups all-purpose flour

  • 1 cup granulated sugar

  • 1 Tbsp baking powder

  • 1/2 tsp sea salt (Grammy never uses salt)

  • 1/4 cup shortening

  • 3/4 cup milk

  • 2 eggs, beaten

  • 2 cups blueberries (I used frozen)

For the crumb topping:

  • 1/2 cup granulated sugar

  • 1/3 cup all-purpose flour

  • 1/2 tsp cinnamon

  • 1/4 cup softened butter


For the glaze:

  • 1 cup confectioner's sugar

  • 2 Tbsp melted butter

  • 1/2 tsp vanilla extract

  • water


How it's Done:

  1. Preheat oven to 350 degrees. Grease a 10" square baking pan.

  2. In a mixing bowl, combine flour, 1 cup sugar, baking powder, and salt.

  3. Cut in shortening until the flour mixture resembles a baking mix (like Bisquick).

  4. Add milk and eggs. Stir well. Mixture will be thick!

  5. Fold in blueberries. Hint: If you're using frozen berries, toss them with flour before folding into batter. This will prevent your batter from turning purple!

  6. Pour into prepared pan. It will look lumpy. That's okay. Good, in fact.

  7. Make crumb topping: In a small bowl, combine all ingredients for crumb topping. Sprinkle evenly over top of cake.

  8. Bake for about 50 minutes, until a toothpick inserted near center comes out clean.

  9. Let the cake cool completely.

  10. Prepare the glaze by combining all the glaze ingredients. Add water, a tablespoonful at a time, until the glaze is a good drizzling consistency. Drizzle over cake. Let the glaze set before serving. Cake freezes well.

Saturday, February 6, 2010

If I Knew You Were Comin' I'd Have Baked a Cake

...or at least a cupcake! The sweet treat I chose to make this weekend was a batch of cupcakes. I put together a bunch of ingredients and I'm calling my creation Banana Spice Cupcakes with Cream Cheese Frosting. Here's how it's done:
Mash three over-ripe bananas in a large mixing bowl.


Add 1 1/2 cups milk and 1 cup vegetable oil. If you have whole milk, use it. The creamier, the better. If all you have is skim, so be it. Spend some time stirring this up so it's very well combined.


One at a time, add in 3 large eggs. Beat well between additions.


Add in 2 cups of granulated sugar. Now set this bowl aside and grab another one.


In this new bowl, measure out 3 cups of cake flour. If you don't have cake flour, all-purpose flour will do, but sift it first, or at the very least, give it a good stir with a spoon before you measure it.


Into the flour, stir 2 tsp baking powder, 2 tsp ground cinnamon, 1/4 tsp ground cloves, 1/4 tsp ground nutmeg, and 1 tsp sea salt (I use sea salt for everything. Table salt will do just fine).


All at once, add the flour mixture to your wet ingredients and stir thoroughly to combine.


Line muffin tins with liners, or spray with non-stick cooking spray. Fill 3/4 full with batter.
Bake at 350 degrees for about 22 minutes, or until toothpick inserted near center comes out clean.

Let the cupcakes cool completely before frosting. It's a good time to begin your frosting. I forgot to take pictures of this part, but it's really easy. Just dump 2 8 oz boxes of softened cream cheese, along with 1/2 cup of softened butter into a mixing bowl. Beat on high until light and fluffy. Beat in 3 cups of confectioner's sugar gradually, and also add 1 tsp of vanilla extract. Use this to frost your cupcakes. Then, sprinkle them with cinnamon and sugar (1 part cinnamon to 3 parts sugar).


Enjoy!

Thursday, January 21, 2010

Sometimes, All You Need is Cake.

Day 21.


It's my birthday.

Every year, for everyone's birthday, I make cake. I take special orders: what flavor, what color, what design? And I make a cake.

Even my own.


No, really, I enjoy it, and prefer my cake over store-bought.

This year, I was going to make sponge cake with alternating filling layers of blueberry and lemon, with fondant icing and a big white fondant bow on top. Simple, elegant, delicious.

Then my daughter told me that she wanted to make me a cake. I was so touched by her generosity...by her thinking of me... Of course I agreed to forego my traditional cake baking and let her run the show! And run the show she did! She made a cake from scratch with no adult assistance at all. She found the recipes. She did it all. And we got to eat it.

And it was good.

I am so proud of my little cake baker. But most of all, I am so proud of her spirit of giving.


Bayberry's Dark Chocolate Buttercream Frosting (Borrowed from Kittencal at Recipezaar)

frosts top and sides of a double layer 9" round cake, with leftovers for licking and sharing with siblings


Ingredients:

  • 1/2 cup butter, room temperature
  • 3 cups powdered sugar
  • 1/3 cup 1/2 & 1/2
  • 1/2 cup dark unsweetened cocoa
  • 1 1/2 tsp vanilla extract

How it's Done:

  1. Cream butter in mixing bowl. Add cocoa. Beat in sugar and 1/2 & 1/2 and vanilla, alternating adding sugar and 1/2 & 1/2 / vanilla until smooth and creamy. Stop every so often and scrape down the sides of the bowl.
  2. Frost cake as desired.

*NEW!* Stay current on what's cooking!

Enter your email address:

Delivered by FeedBurner

LinkWithin

Related Posts with Thumbnails