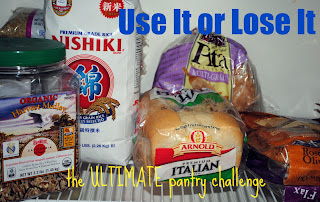
Showing posts with label vegetarian. Show all posts

Monday, April 11, 2011

Pinto Beans in Smoky Tomato Sauce (Use it/Lose it day 4)


Breakfast: Cheese Grits and milk


Lunch: Fried Rice (using the one portion of Steak Em I have left, along with the veggies in my house right now)


Dinner: Pinto Beans in Smoky Tomato Sauce (recipe follows) with rice and green beans


Snack: Applesauce with cinnamon sprinkled on top

Pinto Beans in Smoky Tomato Sauce
(Whole sauce recipe is 3 Points Plus value)

What You Need:
  • 2 cups chopped tomatoes
  • 1 Tbsp olive oil
  • 1/2 a large onion, chopped
  • 1 Tbsp minced garlic
  • 1/2 Tbsp chipotle powder
  • salt and pepper to taste
  • cooked pinto beans (1 cup per person should do)
How it's Done:
  1. Sautee the onion in the olive oil until soft (about five minutes). Add the garlic, cooking and stirring another 30 seconds. Stir in the seasonings.
  2. Serve with pinto beans & rice. Queso fresco is excellent on top.

Sunday, April 10, 2011

Onion Dip with Greek Yogurt (Use it/Lose it day 3)


So far, so good! We've got plenty of food and haven't had to get too creative. Here's what was on the menu for day three:

Breakfast: Blueberry Buttermilk Bread; vanilla yogurt with blueberries; milk


Lunch: Boiled Water; apple wedges with peanut butter


Dinner: Beef Stir Fry over Rice (used the flank steak from the freezer, the Meyer lemons (called them "oranges") in my produce bin, the Green Giant teriyaki vegetables from the freezer, some fresh broccoli, onions, soy sauce, ginger, and cornstarch to make this)


Snack: Onion Dip with cucumber slices and raw broccoli (recipe follows)

Onion Dip - 1 Points Plus value per serving
Serves 12


What You Need:
  • 1 cup minced onion
  • 2 cups plain low-fat Greek yogurt)
  • 1/4 cup chopped parsley
  • 1/4 cup chopped chives
  • salt and pepper to taste
How it's Done:
  1. Combine all the ingredients in a bowl. Cover and chill overnight (or all day).
  2. Serve with veggie sticks, crackers, bread cubes...whatever!

Friday, April 8, 2011

Use it/Lose it Day One


Okay folks. Here we go. The "Use it or Lose it" personal challenge has begun. Here are the results from day one...

Breakfast: Greek yogurt with granola and bananas

Lunch: pita bread toasted in olive oil and sprinkled with sea salt, sliced cucumbers and bell peppers, with Greek yogurt-onion dip (recipe coming soon).

Dinner: Spanish Black Beans and Rice (recipe follows) with sour cream and cheddar cheese; steamed broccoli

Snack: apple wedges with natural peanut butter

Spanish Black Beans and Rice - 8 Points Plus value (does not include sour cream or cheese)
Serves 6

What You Need:
  • 1 cup dried black beans (sorted and rinsed and soaked overnight)
  • 1 large onion, minced
  • 1 large bell pepper (I chose red), diced
  • 1 Tbsp minced garlic
  • 2 Tbsp olive oil
  • 1 Tbsp salt
  • fresh cracked black pepper to taste
  • 1 cup chopped tomato
How it's Done:
  1. Cook the beans until almost tender. Puree half of them and return to pot.
  2. Meanwhile, saute the onion and pepper in olive oil until tender (about five minutes). Add the garlic and cook and stir another minute or so.
  3. Preheat your oven to 350 degrees.
  4. Stir in the tomato, beans, and rice. Tranfer the mixture to a 2 quart baking dish and put it in the oven. Pour water over the mixture until it's completely covered with water.
  5. Bake, uncovered, for an hour to an hour and a half, until rice is cooked through. Add more water as needed.
  6. Let cool a few minutes before sprinkling with cilantro or chives or parsley, slicing into squares, and serving.

Sunday, March 27, 2011

Getting Back to Business

Thank you for all of your support in this difficult time. I'm getting to a place where my medications are levelling out in my system and I feel pretty good. I've been so sick of being out of commission! It was really nice to get back in the kitchen and create a meal today. I hope you enjoy it! ...and expect more, because I'm ready to get back to cooking!

Spanish tortilla is a potato and egg dish, not a tortilla like we use in Mexican cuisine. Don't worry about all the olive oil you use making it. Once you drain it off, it ends up only being 1/4 of a cup for six servings.

Spanish Tortilla
Serves 6 (5 Points Plus value per serving)


What You Need:
  • 1 cup olive oil
  • 1 lb peeled and thinly sliced potatoes
  • 1 medium onion, thinly sliced
  • 8 large eggs, beaten
  • salt and pepper to taste
How it's Done:
  • Heat the olive oil in a large skillet over medium heat until it glistens. After a few minutes, add the potatoes and onions, turning them over with a spatula to coat evenly. Season with salt and pepper.
  • Cook the potatoes and onions, turning every few minutes so as not to allow them to brown. You want the potatoes to soften so that they are easily pierced with a fork.
  • Meanwhile, beat the eggs and season them with salt and pepper. Heat your oven to 350 degrees (this is the easiest way to finish cooking the tortilla).
  • Once the potatoes are fork tender, drain them in a colander over a bowl, reserving the oil.
  • Pour about two tablespoons of the reserved oil back into the skillet and return the potatoes and onions to the skillet. Place over medium heat.
  • Pour the beaten eggs over the potatoes. Cook, undisturbed, about eight to ten minutes at medium-low, until the edges are set.
  • Slide your spatula around the edges and under the tortilla to loosen it from the skillet.
  • Move the skillet to the preheated oven and finish cooking (about ten minutes).
  • Slice and serve.

Thursday, January 27, 2011

Pasta with Vodka Sauce...on Weight Watchers!


I want to take minute to talk to you all about one of most dieter's pet peeves. The ever-present Food Police. You know the type. They are always asking things like, "Should you be eating that?" or "Are you allowed to eat that on Weight Watchers?" or "Isn't that high in fat/calories/carbs?"

First: If you love a person and truly have their best interest at heart, phrase the question nicely, calmly, and in a caring manner. We might still snip at you, but your intentions will show through and we'll appreciate the support. I mean, if I was about to sit down to a pan full of brownies, I'd want my husband to ask me if I really thought that was a good idea. I would want the support.

But if I'm sitting down to a brownie a la mode, with a big ol' grin on my happy face, I've already counted the points values for those items on my plate. I've planned. I've sacrificed. And gosh darn it, I'm going to enjoy every bite of it.

And I'm allowed to eat whatever I want to eat. Even brownies. Even a la mode.

And so Food Police asking if I can/should/really want to/am allowed to eat that decadent dessert are just nosy and rude.

Weight Watchers isn't about deprivation. As a matter of fact, we're encouraged to treat ourselves, however we see fit, every week, even!

This recipe uses vodka sauce. Vodka sauce has heavy whipping cream in it! Yes, even heavy whipping cream has a place in Weight Watchers.

This is a Weight Watchers recipe, mildly modified to suit what I had on hand. And it goes from pan to table in the time it takes to cook the pasta!

Pasta with Vodka Sauce
Serves 6 (9 Points Plus value per serving)

What You Need:
  • 12 oz pasta (penne is traditional but use what you have)
  • 2 Tbsp extra virgin olive oil
  • 1/4 cup minced onion
  • 2 cloves garlic, minced
  • 3 Tbsp tomato paste
  • 1/4 cup chopped fresh parsley
  • salt & pepper to taste
  • 1/4 cup (2 oz) vodka
  • 1/2 cup heavy whipping cream
How it's Done:
  1. Cook pasta al dente and drain.
  2. Meanwhile, heat the oil in a skillet over medium heat. Saute' the onion and garlic for three minutes.
  3. Add the tomato paste, parsley, salt, and pepper. Cook and stir for about five minutes, scraping the bottom of the pan.
  4. Pour in the vodka, cook and stir, scraping the bottom of the pan, for three minutes.
  5. Reduce the heat to low and stir in the cream. Cook and stir three more minutes.
  6. Toss sauce with the pasta. Yields about one cup per serving.

Tuesday, January 18, 2011

Boiled Water

For my birthday, my mother bought me the Bittman book collection, How to Cook Everything and How to Cook Everything Vegetarian. I'm so excited because I love Bittman, his food philosophy and cooking style.

Today, I made the most interesting soup. It's really just bread and water. And Bittman calls it Boiled Water.

And you know what? It's simple. And fast.

And delicious.

It tastes like grilled cheese. Grilled Cheese Soup.

Boiled Water
from How to Cook Everything by Mark Bittman


What You Need:
  • 4 cups of water
  • 6 to 10 cloves of garlic, crushed (I used minced garlic instead and used 2 Tbsp)
  • 1 bay leaf (didn't have, so I added some oregano instead)
  • salt & pepper to taste
  • 1/4 cup extra virgin olive oil
  • 4 thick slices of French or Italian bread, stale (I used a baguette and did three small slices per bowl)
  • 1/2 cup grated Parmesan cheese
  • fresh parsley for garnish (I skipped it)
How it's Done:
  1. Bring to a boil the water with the garlic, salt, pepper, and bay leaf (or oregano). Reduce heat, cover partially and simmer 15 minutes.
  2. Meanwhile, heat olive oil in a skillet over medium heat. Toast bread in it. It's quick, maybe a minute total cooking time.
  3. Put the bread in each of four bowls. Sprinkle with the cheese.
  4. Bittman says to strain your broth here. I didn't strain mine. It's up to you.
  5. Ladle one cup of broth over each bowl.  Serve immediately.

Sunday, November 7, 2010

Thanksgiving


Do I even need to mention that Thanksgiving is my favorite holiday? I see it as my showcase day: the day when I share my cooking passion and skill with friends and family. My wares are on display. I get to see cleaned plates and food-drunken grins. It's quite an ego-stroke.

This year, I'm toning my Thanksgiving down quite a bit, for two reasons. First, because I want a stress-free holiday season. In years past, I have worked myself into a frenzy cooking ten or more side dishes and an equal number of desserts. Also, I'm working on my weight, so I need to be careful what I serve. There are a couple dishes that I'm going to make that are very fattening but very worth the caloric cost. Other than those, I'm making my dinner plans healthier.

Each day this week, I'll share with you a recipe that I'm using for my family's Thanksgiving celebration. I'm cooking these in real time, and freezing them to use on the big day. That's another way to de-stress your holidays: plan ahead, prepare ahead. I hope you enjoy my recipes.

First recipe: Sweet Potatoes made healthier

Normally, my sweet potato recipe consists of tons of butter, brown sugar, pineapple, and pecans. Here's a healthier option:

Honey-Nut Crunch Sweet Potatoes with Cranberries

What You Need:
  • 2 1/2 lb peeled, cubed sweet potatoes (1" cubes)
  • 6 oz fresh cranberries
  • 1 tsp ground cinnamon
  • 1 cup apple cider
  • 6 oz whole almonds (unsalted), ground into a coarse meal
  • 1/4 cup honey
How it's Done:
  1. Preheat the oven to 400 degrees.
  2. Layer the sweet potatoes and cranberries in a 2 quart baking dish.
  3. Pour the apple cider over the sweet potatoes, then sprinkle with the cinnamon.
  4. Combine ground almonds and honey. Sprinkle over the top of the sweet potatoes.
  5. Bake, covered, for 45 minutes. Remove lid and bake an additional 15 minutes to brown top.


I'm thankful for full bellies and full cupboards...I'm thankful my family never

needs to experience true hunger. What are you thankful for?

Wednesday, September 22, 2010

Low-Fat, Filling Mexican Pizza


As you all know, I started Weight Watchers last week. I had a tremendously successful week! I went to my 2nd meeting today, and weighed in 5.6 pounds lighter! I feel wonderful about it! If you're unfamiliar with Weight Watchers, and all you see are the products for sale in the supermarket, you might think Weight Watchers stresses the use of packaged foods. Nothing could be further from the truth. I am so pleased with the program. It fits in perfectly with my family's lifestyle. I made this for lunch today and it's delicious, low-fat, and very filling. Plus, it's minimally processed -- just my style. Oh, did I mention that it took me about five minutes to put together?

Mexican Pizza Bagels

Per serving, you will need:
  • 1 Bagel Thin (or Sandwich Thin)
  • 1/2 cup "refried" black beans (cook 'em without fat and smash the leftovers!)
  • 1/4 cup chopped raw onion
  • 2 Tbsp salsa
  • 1/3 cup shredded cheese made with 2% milk (I used a Mexican blend)
  • 2 Tbsp low-fat sour cream
How it's Done:
  1. Heat the oven to 375 degrees (if I had a toaster oven, I would have used it instead!).
  2. Toast the bagel thin. While it's toasting, warm up your beans.
  3. Top the bagel thin with the beans, then salsa, then onions, then cheese.
  4. Stick it in the oven for 3 or 4 minutes -- you just want the cheese to melt a bit and the food to heat through.
  5. Top with sour cream and enjoy!

Sunday, August 29, 2010

Polenta Tots

It's the end of the month. I planned very, very poorly for groceries this month. Therefore, our last several days of the month have had to be more creative than even I care for. And my favorite Bare Cupboard recipe searching site, Cooking By Numbers, seems to have been taken off the 'net for some reason, so I've been seriously winging it. I haven't done too badly: we've had vegetable lo mein, bean & rice burritos, even some pan-fried pork chops. But I'm going to be so glad when grocery day rolls around. Enough of this seat-of-my-pants stuff.

One of the tricks up my sleeve is polenta. Using just one ingredient (well, okay, one main ingredient plus seasoning), I can create several dishes: grits, and polenta prepared many ways. Today, I made polenta tots. They're bite-size bits of polenta, baked until crispy on the outside and soft in the middle, golden in color and resembling tater tots. Here's how I do it:

Polenta Tots

What You Need:
  • 2 cups uncooked polenta (also called grits)
  • 6 cups water
  • 1 tsp sea salt
  • 2 tsp garlic powder
  • 1 tsp minced parsley
How it's Done:
  1. Combine everything in a tall-sided saucepan. Bring to a boil. Reduce heat and maintain a simmer, stirring constantly, until your arm is about to fall off. Then, switch hands and do it some more.
  2. No really -- cook and stir about 20 to 30 minutes or until the polenta is pretty much a solid mass that takes a long while to fall back into place after you run a spoon through it.
  3. Line a 9x11" baking dish with parchment or foil. Spread polenta in the dish. Cover and refrigerate several hours, or overnight.
  4. Remove polenta from the pan. Cut into desired shapes. Place on a greased baking sheet. Bake at 375 degrees for 20 minutes. Flip over and bake another 10 to 15 minutes. Sprinkle with more sea salt when they come out, if you want.
  5. Serve with pizza sauce.

Friday, August 27, 2010

Messy Lenny

Sloppy Joes. They're the things of childhood. I have fond memories of Manwich and ground beef on a soft, white hamburger bun, dripping all over my plate.


Manwich, however, contains ingredients that I don't want to consume. Take a look:

Ingredients


Tomato Puree , (Water , Tomato Paste) , High Fructose Corn Syrup , Distilled Vinegar , Corn Syrup , Less Than 2% of: Salt , Sugar , Dehydrated Onions , Dehydrated Red and Green Bell Peppers , Chile Pepper , Tomato Fiber , Spices , Guar Gum , Xanthan Gum , Dehydrated Garlic , Carob Bean Gum , Natural Flavors


No, thanks.

And I love beef. I really love beef. It's the only meat I have a love affair with. However, I'm in my 30s, and I need to eat less of it. I'm striving for a mainly plant-based diet, so most beef has to go. My whole family benefits from eating a mostly plant-based diet. Enter the lowly lentil.

Lentils make wonderful ground beef stand-ins for several recipes: Meatloaf, tacos, and sloppy joes are three of my favorites. After reading mixed reviews on lentil sloppy joes, I decided to venture forth and create my own spin on this idea. I love sloppy joes, so it was worth the effort. What I got was a recipe that tasted so much like the Manwich of my childhood that I wouldn't have known the difference had I not been the chef.

This is not a Sloppy Joe. This is Messy Lenny. The Lentil.

Messy Lenny

What You Need:
  • 1 cup brown lentils
  • 2 1/2 cups water
  • 2 Tbsp olive oil
  • 1/2 a large onion, diced
  • 1/2 a large red bell pepper, diced
  • 1 cup ketchup (check for high fructose corn syrup!)
  • 2 Tbsp Worcestershire sauce
  • 2 Tbsp white vinegar
  • 1 tsp sea salt
  • black pepper to taste
  • a few dashed of garlic powder
  • buns for serving (I suggest this recipe)
How it's Done:
  1. Cook lentils in water until tender. Some folks say they can be cooked in 30 minutes. I find that 60 is more realistic. Here's how to cook them: Add lentils to water. Bring to a boil. Reduce heat, cover, and simmer until tender. Check the water level occasionally to prevent scorching. After cooking, if there is more than a couple tablespoons of water left, drain some out and proceed.
  2. Add onion, pepper, and oil. Cook and stir until vegetables are tender.
  3. Stir in the remaining ingredients. Cook and stir until thickened. Remove from heat and serve on buns.

Another Look at Crackers


Yesterday, I wanted to make some crackers for a snack in my daughters' lunches. I went searching all over the Internet looking for just the right recipe. I settled on this recipe, but changed it quite a bit. Don't be intimidated by nutritional yeast. It's not the same as the bread rising sort of yeast. Nutritional yeast is golden in color and is usually flaked. It's also not the same as brewer's yeast. Nutritional yeast has a cheesy, nutty flavor to it and is great for seasoning and for making cheesy sauces. These crackers taste like a cross between Goldfish and Oyster crackers.
Nutritional Yeast is often sold in the bulk section of health food stores.

Homemade Crackers
adapted from Shmooed Food

What You Need:
  • 2 3/4 cups unbleached flour
  • 1/2 cup nutritional yeast flakes
  • 1 tsp baking soda
  • 1 tsp onion salt
  • a few shakes of cayenne pepper
  • 1/4 tsp garlic powder
  • 1 tsp dry mustard
  • 1/2 cup cold olive oil
  • 1/2 cup plus 2 Tbsp ice water
  • 1 Tbsp apple cider vinegar
  • sea salt for topping, if desired

How it's Done:
Heat the oven to 375 degrees. Cover baking sheets with parchment paper.

Combine all the dry ingredients in a large mixing bowl.

Slowly drizzle in the olive oil while stirring. Then, drizzle in the water and apple cider vinegar.
Form the dough into a ball. I found it easiest to form it into three balls and work with smaller pieces.

Roll the dough very thin -- under 1/8th of an inch. This is important, because the crackers will puff up substantially even this thinly rolled.

Cut as desired. I used some small cutters. You don't have to do that. You can use your pizza cutter to cut them into squares.

Place them on your baking sheet. 1/2" apart is plenty, as they don't expand.


Bake the crackers 10 to 12 minutes, or until browned. They will get crispier as they cool.
Repeat until all your dough is used. It's much harder to reroll "recycled" dough. It gets very stiff, so use as much of it as you can the first time around.

Wednesday, August 18, 2010

Cookies -- I Mean, Pancakes -- For Breakfast


My children are not always eager to eat breakfast when they wake up each morning. They prefer to sit around and spend some time waking up. Unfortunately, the time they spend is valuable time that we need them to use getting ready for school. I've learned that if they wake up to the smell of something pleasant cooking, it whets their appetites and they come downstairs practically drooling and asking what's for breakfast. These pancakes let off the aroma of baking cookies and taste just as good.

Oatmeal Cookie Pancakes

What You Need:
  • 1 cup flour
  • 1 cup old fashioned oats
  • 1/2 cup sugar
  • 1 tsp ground cinnamon
  • 2 tsp baking powder
  • 1/2 tsp sea salt
  • 2 large eggs
  • 1/4 cup melted butter
  • 1/2 cup sour cream
  • 1/2 cup plus 2 Tbsp milk
  • 1 1/2 tsp vanilla extract
  • 1/2 cup raisins
  • 1/4 cup mini chocolate chips
  • butter and/or maple syrup for serving
How it's Done:
  1. Combine flour, oats, cinnamon, sugar, baking powder, and sea salt in a large bowl. In a separate bowl, beat eggs. Whisk in sour cream, then melted butter and milk. Stir in vanilla.
  2. Add wet ingredients all at once to dry. Stir just until moistened.
  3. Drop batter by 1/3 cupfuls onto griddle or skillet heated to medium to medium-high.
  4. Sprinkle each pancake with a few raisins and a few chocolate chips. Let the pancake cook until bubbles break the surface, and then flip them and finish cooking, about 30 seconds longer.
  5. Serve with butter and maple syrup, or just eat plain. They're really good that way, too.

Thursday, August 12, 2010

The Little Drummer Girl

Bayberry joined the middle school band. Her instrument? The snare drum. Tomorrow, I get to go to the music store and pick up her very own snare drum and drumsticks so that she can perfect her music at home. With a captive audience.

Where are my ear plugs?

I'm joking.

Sort of.

I'm totally supportive of her playing a musical instrument, even the snare drum. I hope that she finds out that she loves it and wants to continue it all through school. I was part of my high school's marching band and I absolutely loved it. I lived for band. I'm sure it kept me out of all sorts of trouble, too.

She's also joining Cross-Country. This kid isn't going to have any anxiety at all! Between beating it out on a drum and running for her life, all her worries are just going to melt away.

Ha! She's a middle school girl. It's going to take more than runnin' and drummin' to chase all of THOSE worries away.

As for me, I'll just keep her well-fed. Here's a start:

Chewy Chocolate Chip Granola Bars
Serves 10

What You Need:
  • 2 1/2 cups rolled oats
  • 1/4 cup flaked coconut
  • 1/2 cup cereal (any kind will do. I used corn puffs, like Kix)
  • 1/2 cup mini chocolate chips
  • 1/2 cup raisins
  • 1/3 cup oil (I used safflower)
  • 1/3 cup honey
How it's Done:
  1. Preheat the oven to 350.
  2. Combine all the ingredients and press firmly into an 8- to 10" square baking dish.
  3. Bake for 30 minutes, or until edges begin to brown. Remove from the oven and let the granola cool completely. This allows it to set. Cut into bars. Store covered at room temperature.

Monday, August 9, 2010

Simple Refried Beans & Homemade Tortilla Chips

I love refried beans. Tasty, smooth, nutritious, and easy to make, they're a great food to have around when you're craving junk food. Nachos with homemade refried beans are much better for you than that can of bean dip or a run to Taco Bell. Just look at how simple it is to make your own batch.

Refried Beans

What You Need:
  • 1/2 lb dry beans (or 2 to 3 cans of pinto beans, rinsed and drained)
  • 1/2 an onion, diced
  • 1/2 a jalapeno pepper, seeded and diced
  • optional added nutrition: 2 to 3 small sweet peppers, seeded and diced
  • 1 tsp garlic powder
  • 1 Tbsp olive oil
  • 1 tsp sea salt
  • 1 tsp freshly cracked black pepper
How it's Done:
  1. If you're starting from dried beans (and please do. They're so easy, affordable, and much tastier than their canned counterparts), sort through the beans and dump them in your slow cooker. Cover with water almost up to the top of the slow cooker. Cover and cook on low overnight. After breakfast,  drain the beans and continue making your refried beans. If you're using canned beans, be sure to rinse them very well.
  2. Let your machines do the work for you. Dump the beans, onion, peppers, garlic powder, oil, salt, and pepper into your food processor. Process until mostly smooth. I like to leave some chunks in mine, You can make yours as smooth or chunky as you like.
  3. Store tightly covered in the fridge.
Refried Beans Before Processing...


And after...


Look at these cute tortilla chips I made! I simply followed my recipe for corn tortillas, adding food coloring, then I cut them into quarters and fried them in olive oil. How fun!


Sunday, August 8, 2010

Where's YOUR Smoothie 'Stache?

We love smoothies around here. They offer an opportunity to get healthful foods into a squirming, picky eater in very little time, with great taste. This one, like all the smoothies I've posted so far, is Picky Eater approved. Okay, well, maybe there was one smoothie she didn't like. But she loves this one. Just check out her smoothie 'stache.

Chocolate-Covered Cherry Smoothie
Makes 2 servings

What You Need:
  • 2 cups frozen sweet cherries
  • 1 cup milk
  • 3 Tbsp unsweetened cocoa powder
  • 2 Tbsp honey, sugar, maple syrup, or agave nectar
How it's Done:
  1. Whirl all the ingredients in your blender for a couple minutes, until smooth and thick. Pour into tall glasses and serve.

Saturday, August 7, 2010

Make-Ahead Pizza Dough....and Pizza Sticks for Lunch

Now that school's in session, you'll find me every Saturday in my kitchen, cooking for the week ahead. I'm determined to stop relying on basic sandwiches this year and branch out into better lunches. Pizza's great, whether warm or cold, so this was a natural starting point for me. My oldest is in middle school and has a microwave at her disposal, so she'll likely eat her pizza sticks warm. My youngest doesn't have access to a microwave, so we've compared these pizza sticks to the Lunchables pizza lunch, which kids eat cold all the time. She approves.

This dough can be made ahead and frozen so that you have two pizza crusts ready to go for dinner one night when Papa John calls out to you. Instead of relying on delivery (which can cost a family of four as much as I spend per week in groceries), pull out your dough and you'll be ready to bake in no time. If you roll your dough into pizza crust shape before freezing, the thawing time will be minimal. The other option is to keep it in a ball and thaw it overnight in the fridge. Either way, pizza night just got a whole lot cheaper and less complicated.

This is not the first pizza dough I've shared with you, but it has a different texture and taste than this one. The one I shared a while back is great for cracker-thin crusts. This dough is softer, which makes it a natural choice for my kids' school lunches.

Make-Ahead Pizza Dough
Makes enough dough for 2 medium pizzas (thin crust)

What You Need:
  • 1 packet active dry yeast
  • 1 Tbsp sugar
  • 3/4 cup warm water
  • 1 tsp sea salt
  • 1/4 cup chopped fresh herbs (if desired. adds color and flavor. I used parsley, basil, and thyme)
  • 2 Tbsp melted butter
  • 2 to 2 1/2 cups flour (white or whole wheat, or a combination)
How it's Done:
  1. Stir together yeast, sugar, and water, and let it sit until bubbly. Stir in half the flour, the salt, herbs, and melted butter.
  2. Knead in remaining flour until a stiff dough forms. Knead about 6 minutes.
  3. Turn the dough out into an oiled bowl. Cover and place in a warm spot for 45 minutes to an hour, or until the dough has doubled in size.
  4. Punch the dough down, divide it in half, and roll each half into desired shapes. In my case, rectangles, as I'm making pizza sticks. I want my sticks on the thick side, so I rolled my dough into rectangles that were about 1/2" thick. Place the dough on baking sheets sprinkled with cornmeal. You can freeze at this point if you want. Otherwise, proceed.
  5. Let the dough rest 20 minutes. Then, top as desired and bake at 400 degrees for 15 to 20 minutes.
For my pizza sticks, here's what I did once the dough was rolled into rectangles:
  1. I placed each rectangle onto a baking sheet sprinkled with cornmeal.
  2. I used a pizza cutter to cut through (but not separate) the dough, making 1" wide strips.
  3. I spread a bit of pizza sauce -- just a couple tablespoons per rectangle -- on the dough.
  4. Then, I topped the sauce with sliced veggies. In this case, sweet banana peppers.
  5. Next, I sprinkled about 1/3 cup shredded mozzarella and a bit of Parmesan cheese on each rectangle, and baked them for 15 minutes at 400 degrees. I let them cool slightly before recutting the strips.

Monday, August 2, 2010

Fairy Princess Bread (aka Pink Egg Bread)

I'm spending this week getting ready for packing school lunches. Today, I made some Fairy Princess Bread. I've got a whole magical princess lunch theme planned in my head. It includes toad stools and magic wands and crowns and princesses and such. It should be fun. Changing the color of food is something easy and fun you can do to avoid the monotony of lunch box preparation. It's easy to add a few drops of food coloring here and there. Here's my egg bread recipe. It serves me well. Oh -- and, no, the addition of the red food dye didn't alter the taste at all.

Fairy Princess Bread
makes one loaf (16 or so slices)

What You Need:
  • 1 packet yeast
  • 1 Tbsp sugar
  • 1/4 cup warm water
  • 1/2 cup warm milk
  • 3 Tbsp melted butter
  • 2 large eggs
  • 1 tsp sea salt
  • 3 3/4 cups all-purpose flour
  • food coloring if desired (about a dozen drops of red for pink bread)
  • egg wash if desired, though I skipped it -- 2 beaten eggs with 1/4 cup water
How it's Done:
  1. Stir together the yeast, sugar, and water. Let it stand 10 minutes.
  2. Slowly beat in eggs, milk, butter, and salt. Add half of the flour. Beat on medium speed for 3 minutes, then add the remaining flour, until a soft, cohesive dough has formed.
  3. With your mixer running, add in food coloring, a few drops at a time, until desired color is reached.
  4. Knead about 10 minutes. Turn dough into an oiled bowl, cover, and let rise in a warm place for 90 minutes.
  5. Punch down the dough. Cut off one-third of the dough. With the remaining dough, divide into 3 equal balls. Roll each ball into a 14" rope. Braid these three, starting at the center and braiding out on each side. Pinch ends closed.
  6. With remaining 1/3 of the dough, divide into 3 equal portions and roll into 16" ropes. Braid these the same way. Place the thinner braid on top of the thicker braid. Pinch ends to seal.
  7. Cover and let rise again, for about 30 minutes.
  8. Brush with egg wash if desired.
  9. Bake at 375 degrees for 25 to 30 minutes, or until loaf sounds hollow when you thump the bottom.
  10. Let cool completely before slicing. This bread freezes nicely.

Sunday, August 1, 2010

Bites Around My House...then the Blogosphere

It's August! For us, that means back to school. School starts on Friday in my neck of the woods. We're getting ready: we finished school shopping, we organized closets and drawers; we labeled school supplies with names; we are going to bed early and waking up early in preparation for the Big Day. When does school start for your kids? How do you prepare?

Breakfast this morning is a recipe from the Taste of Home Cookbook. It's not often I cook other people's recipes, because the more of other people's recipes I cook, the less I can create my own. However, I wanted some inspiration from other people and places this week, so I'm starting with a very tasty breakfast recipe called the Chocolate Chip Dutch Baby.

Chocolate Chip Dutch Baby
from Taste of Home

What You Need:
  • 2 large eggs
  • 1/2 cup 1/2 & 1/2
  • 1/2 cup all-purpose flour
  • a dash of cinnamon and nutmeg
  • 1/4 cup brown sugar (packed)
  • 1/4 cup mini chocolate chips
  • 3 Tbsp butter
How it's Done:
  1. Preheat the oven to 425 degrees. While it's preheating, stick the butter in a 9" pie plate and leave it to melt in the oven.
  2. Meanwhile, beat eggs, 1/2 & 1/2, flour, cinnamon, and nutmeg. Set aside.
  3. In a small bowl, combine sugar and chocolate chips.
  4. Remove the pie plate from the oven and carefully pour the batter over the hot butter. Sprinkle the chocolate chip mixture over top. Bake for 15 minutes or so, until the edges are puffed up and browned.
  5. Serve right away, with maple syrup if desired. It's definitely sweet enough without the syrup, though.
I'm also looking for a few guest bloggers. Interested? I'm looking for home cooks who cook from scratch and would like to share their recipe here at All Home Cooking. Email me at all_home_cooking at yahoo dot com -- I'm looking for several bloggers to guest post over the course of the month of August. Hope to hear from you!

Speaking of other people's recipes, here are some that sparked my interest and that I will definitely be making in the future:

Peppermint Biscotti at Beat Until Fluffy

Plum and Raspberry Upside-Down Cake at Meet Me in the Kitchen

Fava Bean & Brown Rice Salad at So Good & Tasty


Blueberry Pie at What Megan's Making

Tuesday, July 27, 2010

No-Bake Peanut Butter & Jelly Snacks


It's the middle of summer. Temperatures are in the upper 90s and lower 100s. There's no breeze. You could pour yourself a nice warm cup of air and drink it.

But the kids want a snack.

Here's one that will give them some protein to keep them going in the pool, sprinkler, or slip n slide.

No-Bake Peanut Butter & Jelly Balls
Makes about 20 snacks

What You Need:
  • 1 cup graham cracker crumbs (or other cookie crumbs)
  • 1 cup peanut butter (I used freshly ground, just peanuts, so it's very thick)
  • 1/4 cup raisins
  • 1/4 cup jam/jelly/preserves
  • 2 Tbsp maple syrup or honey
How it's Done:
  1. Combine all ingredients in food processor (or mix by hand for chunkier snacks) and process until the dough forms a ball.
  2. Shape into 1" balls. Roll in confectioner's sugar, coconut, or unsweetened cocoa powder.
  3. Chill for at least an hour before serving. Unless your kids are like mine. Incidentally, I find that these freeze well and make good lunchbox snacks.
Tuesday Tag-Along

LittleYayas

***WHILE YOU'RE HERE, ENTER TO WIN A SODASTREAM PACKAGE!

*NEW!* Stay current on what's cooking!

Enter your email address:

Delivered by FeedBurner

LinkWithin

Related Posts with Thumbnails