Monday, May 17, 2010

Silly Warning Labels


Day 137.

Have you ever paid attention to some of the warning labels on merchandise? Here's a few I can remember:

  • On a fishing lure: Caution! Harmful if swallowed.
  • On a stroller: Remove child before folding.
  • On a hair dryer: Do not use while bathing.
  • An iron: never iron clothing while it is being worn.
  • On a wheelbarrow: Not intended for highway use.
  • On a Dremmel tool: Not for use as a dental drill.
  • Christmas Lights: WARNING! For indoor or outdoor use ONLY!
  • Car window sunscreen: Do not operate car with screen in place.
Pretty funny, right? But you know that there's always a reason for those weird labels. Someone had to be dumb enough to do that stuff and sue the company over it before the company had to put those warnings in place.

Here's another warning:


This warning it on the back of my can of sweetened condensed milk.

Call me a rule breaker, or a label maker. I heated it in the can and it was wonderful. Note: I do not advise you to heat your sweetened condensed milk in its can. No, I would never advise you to use your slow cooker and a can of sweetened condensed milk to make luscious dulce de leche that's so tasty you can scarcely let it cool enough so as not to burn your tongue before diving into it.

Because the can says you should never do that.

Ever.

...But if you were interested, for purely scientific reasons, about how mine turned out, it would only be fair for me to show you, right?

So first, you'll want to peel off the label. That way, the pesky warning isn't staring your defiance in the face the whole time. Set it on an old rag in your slow cooker. If you don't, you'll end up with a weird ring where the metal of the can meets the crock. Fill the crock with water. Cover it and heat it on low for 8 to 10 hours or so.
Take it out with tongs. It's hot. Open it up. Mine squirted hot caramel at me when I punctured the can, so be careful.
Try not to eat the whole thing at once, and maybe you can use it to make these delicious brownies:


Dulce de Leche Brownies
What You Need:
  • 1/2 cup dulce de leche
  • 1/2 cup melted butter
  • 1 cup granulated sugar
  • 2 eggs
  • 1/4 cup cocoa powder
  • dash of sea salt
  • 1/2 tsp vanilla extract
  • 3/4 cup all-purpose flour
How it's Done:
  1. Preheat the oven to 350 degrees. Spray a square 8" baking dish with non-stick cooking spray.
  2. Beat butter, eggs, and sugar together. Add vanilla.
  3. Stir in cocoa powder, sea salt, and flour.
  4. Spread batter in prepared pan. Dot with dulce de leche. Use a knife to create some swirls with it, but leave some of it in clumps, too.
  5. Bake for 20 to 25 minutes.
  6. Allow the brownies to cool before cutting. If you can.

Menu Plan Monday 5/17 - 5/23 AND Garden Update

It's Monday! Is it just me, or has time been flying by lately? It seems like summer is zooming toward me at full speed and I'm not sure I'm ready for it!

I'm certainly ready to start eating the yummy produce from my patio garden, though. I'm impatiently waiting for my cherry tomatoes to vine-ripen. Here are a few pictures of what's going on in my garden:

Our serrano peppers are about two inches long!


Our crookneck squash are in full bloom!


Our watermelon plants are sending out feelers!


Our cherry tomatoes have exploded with fruit!


Picky Eater's cucumber plant has its first cuke!

Last week went well. I didn't adhere to my menu plan like I should have, but we ended up with some good eats. Here are a few of the things we enjoyed last week:


And here's what I'm expecting to prepare this week:

Breakfasts:
  • Peanut Butter Oatmeal
  • Granola with Milk and Berries
  • Granola with Yogurt and Banana
  • Homemade Pop Tarts
  • Yogurt Pancakes
  • Cornmeal Waffles
  • Rice Pudding

Lunches:
  • Baked Brie with Vegetable Soup
  • Chicken Spread with Cheese Crackers
  • Steak Fajitas
  • Chicken salad wraps
  • Deviled Eggs & Veggie Sticks with Dip
  • Grilled Cheese Sandwiches
  • Tacos with Cheesy Shells

Dinners:
  • Black Eyed Peas with Bacon and Snap Beans, Cornbread, and Cabbage
  • Rib Eye Steaks, Roasted Green Beans, and Potato Wedges
  • Pork Chops, Corn on the Cob, and Broccoli with Parmesan Cheese
  • Fried Tofu Nuggets, Saucy Black Beans, Garlicky Biscuits, and Green Beans
  • Meatballs with Yogurt Sauce, Crusty Bread, and Corn
  • Chicken Wings, Fries, and Salad
  • Gorgonzola Burgers with Bacon, Cucumbers, and Corn
Baking:
  • Peasant Bread
  • Strawberry-Rhubarb Pies
  • Blueberry-Corn Muffins
  • Zucchini Bread
  • Dulce de Leche Brownies
A lot of these are original recipes, so I hope you'll stop by throughout the week for the recipes and pictures. I post nearly daily.

Consider becoming a follower. :) I love followers and comments, too! You can follow me here and on Facebook at All Home Cooking. All Year Long. For more menu plan ideas, visit I'm an Organizing Junkie each Monday.

See you soon, and happy cooking!

Sunday, May 16, 2010

Once in a Blue Moon


Day 136.

Normal dinner table talk at our house:

Picky Eater: Are there onions in this?

Me: Yes, but they're small. You won't even be able to see them.

Picky Eater: I don't think I like this.

Me: Just try it. You won't know unless you try it.

Picky Eater: How many bites do I have to take?

Me: Take as many bites as you'd like. Just give it a fair shot.

Picky Eater: (pushes food around plate. takes a lick. pushes some more.) I don't like this.

Me: Okay, but that's what we're eating this evening. I'm sorry you don't like it.

Picky Eater: But how many bites do I have to take?

Me: As many as you'd like.

Picky Eater: But how many? How many, Mommy?

Me: Five. Take five bites. How's that?

Picky Eater: (quickly shovels five small bites in her mouth.)


That's an average day. But every once in a great while...every blue moon...dinner goes like this:

Picky Eater: Are there any onions in this?

Me: Yes, but only a tiny bit.

Picky Eater: How much?

Me: One-fourth of an onion.

Picky Eater: Okay.

Me: (okay? Did she just say, "okay?")

Picky Eater: (happily chowing down) If I'm still hungry when this is gone can I have more?

Me: (Is this really happening?) Sure, honey, there's extra.

Picky Eater: Good, 'cuz this is delicious, Mommy.

Me: (sighing happily)

Picky Eater-Approved Bacon Cheeseburger Pasta
Serves 4 to 6

What You Need:
  • 1 lb ground beef
  • 1/4 of a large onion, diced
  • 1/2 lb pasta, cooked and drained (I used ziti)
  • 1/4 cup all-purpose flour
  • salt and pepper to taste (1 tsp of each was just right for us)
  • 2 cups milk
  • 2 1/2 cups shredded cheddar cheese
  • 1/4 cup ketchup or barbecue sauce
  • 4 strips of bacon, crisp-cooked and crumbled
How it's Done:
  1. Preheat oven to 350. Brown ground beef with onion. Sprinkle with flour. Cook and stir until all the flour is absorbed.
  2. Slowly stir in the milk, salt, and pepper. Cook and stir until thickened like gravy. Remove from the heat and stir in 2 cups of cheese and ketchup or BBQ sauce.
  3. Toss pasta and sauce together. Pour into a 2 quart baking dish.
  4. Top with the remainder of the cheese and the crumbled bacon.
  5. Cook 15 to 20 minutes, until cheese is melted.

Bites Around the Blogosphere 5/16/10

Whew! Life has been BUSY around here! We just had a successful yard sale this weekend. I'm glad to be rid of lots of stuff and have some extra cash, but it was an exhausting experience. Anyway, it's Sunday. It's time for some yummy bites around the blogosphere.

Bites Around the Blogosphere is a weekly feature here at All Home Cooking when I share some of my favorite bites from other bloggers. I hope you'll enjoy them. Tell them Michelle @ All Home Cooking sent you. :o)

S'Mores Muffins at A Foodie Fairytale

Key Lime Cookies with White Chocolate at Andrea the Kitchen Witch

Easy Tempeh Tostadas at Bankrupt Vegan

Flowers, Bugs, and Babies at Cookie Crazie

Vanilla Ice Cream at Jenn's Food Journey

Blueberry Polenta Coffee Cake at kitchen meditation

Buckeye Cake at Lamp Unto My Feet

Herbed Yogurt Spread at What Megan's Making

Enjoy! See you back here later for a tasty recipe!

Thursday, May 13, 2010

Breakfast Barley


Day 133.

Today started on the wrong foot.

I woke up to my alarm, which for most people, is normal. For me, it means oversleeping. Let me explain. My internal alarm clock seldom fails me. I wake up with the sun. Even on the weekends. I hate waking up to the sound -- any sound--- of an alarm clock. So I only use it as a backup device. I depend on my internal alarm clock and the sun to rouse me from sweet slumber, but set the alarm on my phone just in case. Besides: grey mornings don't wake me as effectively as sunny ones. The system generally works well.

But this morning I really could have used those extra 45 minutes. Because the kids had NO clean school-appropriate clothing washed, dried, and ironed. And breakfast had to be made. And because I was very distracted last night, Picky Eater's homework went untouched. That's uncharacteristic of both of us.

So this morning, I had to wash and dry school clothes, prepare breakfast, call the voter registration people who registered me in the wrong county, call the school, orchestrate homework, backpack packing, tooth brushing, face washing, and shoe tying.

It's now 9:16 a.m. and the kids are late for school. Does it make me a terrible mother that I'm considering letting them play hookie today? :(

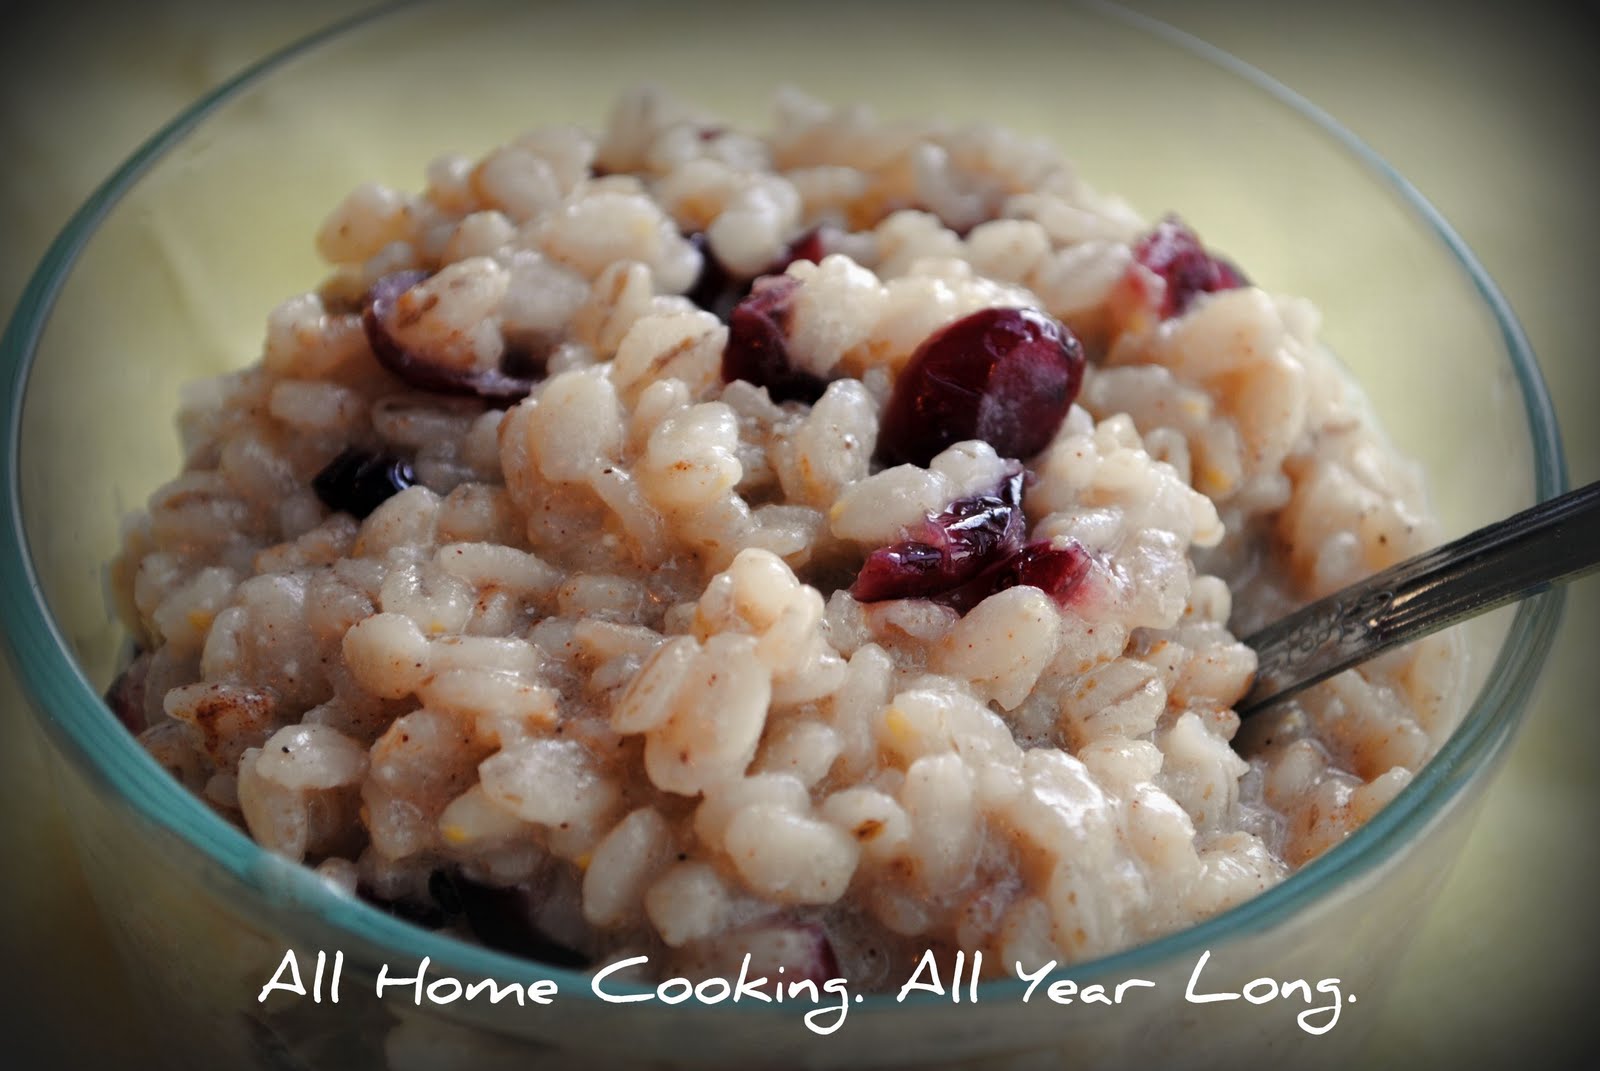
At least breakfast was delicious. I wanted something warm and wholesome, and I had to use up some barley. It makes a very tasty hot cereal.

Breakfast Barley
serves 4

What You Need:
  • 1 cup milk
  • 2 cups water
  • 1 1/3 cups quick-cooking barley
  • 1/4 cup honey
  • 1 tsp ground cinnamon
  • 1/2 cup dried cranberries or other fruit
  • 2 Tbsp coconut oil or butter
How it's Done:
  1. Bring milk, water, and oil or butter to a boil. Stir in barley.
  2. Reduce heat, cover, and simmer on low for 14 minutes.
  3. Remove from heat. Stir in honey, cinnamon, and dried fruit.
  4. Cover and let sit for five minutes before serving.

Wednesday, May 12, 2010

Freezing Veggie Scraps Works for Me!


Here's something new I'll participate in: Works for Me Wednesday. Basically, it's about sharing tried and true techniques for...well...everything under the sun. Since mine is a cooking blog, I'll keep my tips in the kitchen. Or at least about food.

Today, I'd like to tell you about how I get rich vegetable stock from scraps. And I do it in my sleep.

Summertime is quickly approaching. While I love soups, summertime just isn't a good time of year to enjoy them. However, many recipes still require broth or stock, and those cans and boxes of broth and stock at the grocery store are just...bad. Salty and bland. Who wants that? Not me.

Instead, I make my own stocks and broths. Not long ago, I wrote about making chicken stock using the oven and stove top. But again: Do you want to heat up your house for it? I don't. Enter the slow cooker. This marvelous piece of chicken brilliance saves energy and doesn't heat up your kitchen like a simmering pot of stock would.

Here's how I make vegetable stock in my sleep"

  1. I keep a freezer bag in my freezer for collecting vegetable scraps. Almost anything goes: onion skins, broccoli stalks, cabbage cores, carrot peels, lettuce leaves, celery leaves...whatever I wouldn't use for a recipe, as long as it was just vegetable (no fats added in cooking), it goes in the bag. It takes me about a week to accumulate enough scraps to make stock.
  2. I fill my biggest slow cooker with the scraps, then I fill the rest of the space with water, all the way to the top of the pot. I add a little salt, and some pepper, and some freshly cut herbs.
  3. It cooks all night while I'm sound asleep.
  4. The next morning, I position a colander over a large bowl or pot and strain the liquid out of the vegetables. The vegetables go in the trash, and the liquid can either be used immediately or stored for future use. If I'm storing it, I like to freeze it in 2 cup portions. It'll keep for 6 months in the freezer.
And there you have it. "Free" vegetable stock, with very little effort. That works for me. :)

Tuesday, May 11, 2010

Wisdom from a Candy Company?

Day 131.

I don't watch much television anymore, so I'm not sure if the commercials are still using the same slogan, but do you remember Skittles's slogan about tasting the rainbow? They make a very good point. Stay with me now.

Don't go out and buy a bag of Skittles. They rots your teeth and your insides, too. But abide by the slogan. Taste the rainbow. It's good for you.

What I mean is this: Try to get your foods from across the colorful spectrum each day. It's hard. It can be done, but it's hard. Instead of aiming for perfection, try a wide variety throughout the week. Here are some fruits and veggies across the rainbow and why you should eat them:

(Please remember, I'm not a doctor, just a person trying to eat healthier and pass on what I learn.)

RED fruits and vegetables contain lycopene, a substance proven to reduce cancer risk!

*Try tomatoes, watermelon, cherries, beets, red cabbage, pomegranate, radishes, rhubarb, and red peppers.

ORANGE and YELLOW fruits and vegetables keep your eyes and heart healthy, and provide different vitamins, including A and C, and folate, which reduces birth defect risks!

*Try oranges, yellow peppers, apricots, lemons, grapefruit, yellow squash, pumpkin, sweet potatoes, and mangoes.

GREEN fruits and vegetables contain chlorophyll. Chlorophyll is a wonder food. Essentially, it's plant blood. Don't get grossed out. Do you know how remarkably similar to our own hemoglobin? Chlorophyll helps keep our red blood cells healthy and strong, and increases energy, too.

*Try artichokes, kiwi, spinach, collard, mustard, or turnip greens, kale, limes, green onion, avocado, and zucchini.

BLUE and PURPLE fruits and vegetables provide valuable antioxidants, which may reduce cancer risk.

*Try blueberries, eggplant, plums, and figs.

WHITE fruits and vegetables can help lower cholesterol and blood pressure.

*Try bananas, cauliflower, mushrooms, turnips, and onions.

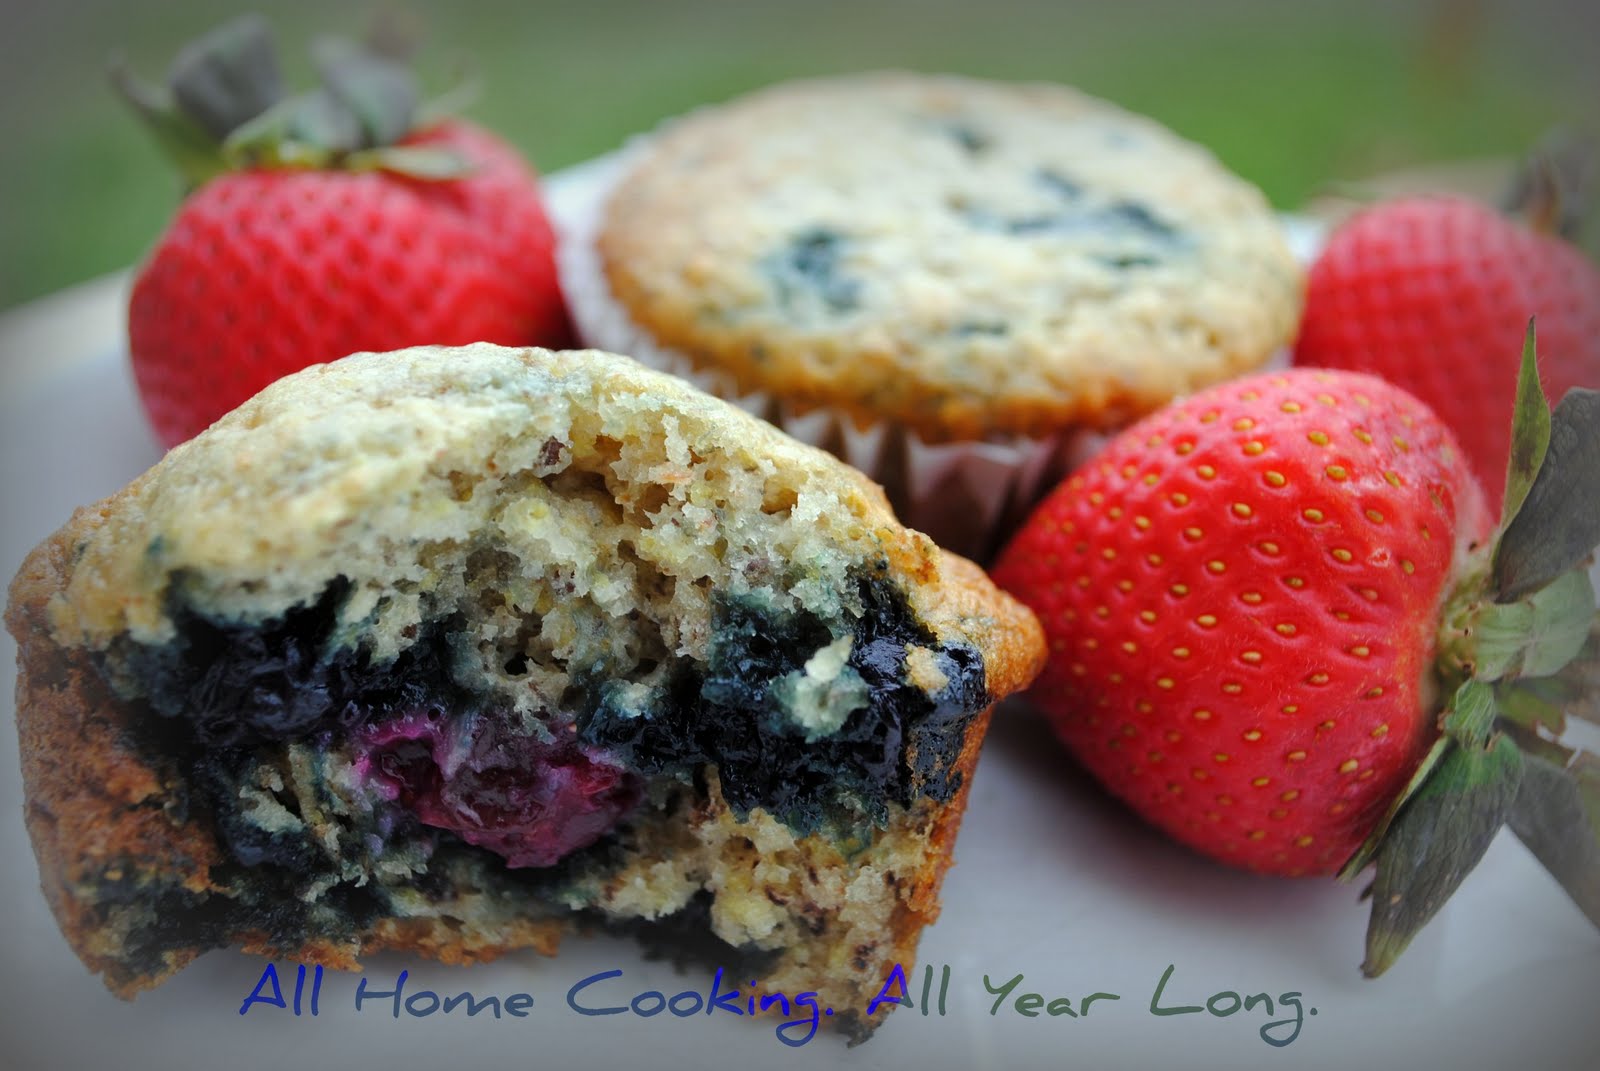
It takes some planning to get all the colors of the rainbow into your day. I don't try for every color every single day (although I should), but I try to make sure that my weekly intake includes a balance from the spectrum. For breakfast, I had white (banana), blue/purple (blueberries), and red (strawberries), so I'm on a roll already. It was as simple as baking muffins and adding a few berries on the side.

Blueberry-Banana Muffins
makes about 15 muffins


What You Need:
  • 2 cups of flour (whole wheat is preferable but use what you're comfortable with)
  • 1/4 cup wheat germ (raw or toasted, your call. I used raw)
  • 1/4 cup ground flax seeds
  • 2 tsp baking soda
  • 1/2 tsp sea salt
  • 5 Tbsp melted butter
  • 1/4 cup granulated sugar
  • 1/3 cup brown sugar
  • 2 large eggs
  • 2 large bananas, peeled and mashed
  • 2/3 cup milk
  • 1 tsp pure vanilla extract
  • 1 cup blueberries (fresh or frozen)
How it's Done:
  1. Preheat your oven to 375 degrees. Line 15 muffin cups with liners or spray with non-stick cooking spray. Set them to the side.
  2. In a large mixing bowl, combine flour, wheat germ, flax seed meal, baking soda, and salt. In a separate bowl, combine mashed bananas, butter, sugars, eggs, milk, and vanilla. Pour all at once into dry ingredients and stir just until they're well-mingled.
  3. Gently fold in blueberries.
  4. Pour the batter into your prepared muffin cups. You want to fill them up about 3/4 of the way. I found that 1/3 cup batter did this nicely.
  5. Bake the muffins for about 20 minutes, or until a pick inserted near the center comes out clean.
  6. Turn the muffins out onto a platter and let them cool a bit before serving.

Monday, May 10, 2010

The Many Degrees of Yum

Day 130.

When eating, there are many stages of deliciousness that one can experience. They look like this:

Degrees of Yum

Stage One: Yuck. I can't believe my taste buds! This is the most disgusting thing I've ever eaten! I can't bring myself to take another bite. I will never, ever eat this again. I need water. Quickly.

Stage Two: This is not very tasty. It's not worth spending my appetite on. It's not the worst thing ever, but burnt toast tastes better than this. I'm putting my fork down and looking for something better to eat.

Stage Three: Well, it's not terrible, but it's not great, either. If it means not hurting someone's feelings, I can bare to eat the rest of this. If it's all that's available, it's fine. I'll eat it. It wouldn't be my go-to dining option, but it's food, and I'm hungry.

Stage Four: This isn't bad at all! Could use something...maybe some salt, or a sauce, but this dish has potential. I will definitely eat this again, perhaps with some revisions to the recipe.

Stage Five: Wow! Now THIS is tasty. Whoever came up with this dish was a genius! I wonder if they'll share their recipe with me. I must have this dish again! I can't imagine going through my life without having had this dish at least one more time, and I'm going to recommend this dish to all my friends. Yum! There's a party in my tummy!

Stage Six: THIS dish is so good that I can't help but gobble it up as quickly as I can possibly choke it down! I can't believe I've never had this before! Where was I? Where was this dish? It's so good that I want seconds. And thirds. Can I bring some home with me? Hey, you over there! You have GOT to try this. It's amazing!

Stage Seven: The elusive stage seven. I suspect many people go through life having never reached this level of culinary ecstasy. At stage seven, nothing else exists but me and the dish. All movement in the room has ceased. There are no sounds except the sound of angels singing. I am beyond shoveling, for shoveling wouldn't do this dish justice. No, this is a dish best savored slowly. Very slowly. Let your lips feel it. Let your tongue feel it. Smell it. Taste it. Slowly. Eat it very, very slowly. Enjoy every morsel of this heavenly delight. This is the most delicious dish I've had in a long, long time. It's so good that it brings tears to my eyes. It's so good that I can't adequately describe it. It's so good that all I can do is enjoy it and gush over it, and I think about it for hours, days, weeks, and months after I experience it. It's so good that continuing to describe Stage Seven is pointless. One must experience Stage Seven to understand. Allow me to help you get there.

The Most Delicious Chocolate Cake. Ever. (a.k.a. Flourless Chocolate Cake)
adapted from Whole Foods

What You Need:
  • 2 cups dark chocolate chips, divided (1 1/3 cup for the cake, 2/3 cup for the icing) (the recipe calls for bittersweet, but to be honest, I don't know the difference and bittersweet was twice the cost)
  • 2 sticks of butter (plus 3 Tbsp later for the icing)
  • 1 1/2 cups granulated sugar (recipe calls for 1 1/4 but I used 1 1/2 accidentally and it was fabulous)
  • 6 large eggs
  • 1 cup unsweetened cocoa powder
  • 1 Tbsp milk
  • 1 Tbsp plus 2 tsp honey (recipe calls for 1 Tbsp but I found it needed more)
  • 1/2 tsp vanilla extract (recipe calls for 1/4 tsp, but again, I thought more was better)


How it's Done:
  1. Preheat your oven to 375 degrees. Spray a 9" spring form pan with non-stick cooking spray. The recipe calls for us to line our pan bottom with parchment, but a.) I didn't have any, b.) I am trying to use less stuff that goes in the garbage, and c.) I like to keep things cheap and simple when possible, so I didn't use it.
  2. In the microwave (or in a double boiler, your choice), melt the 1 1/3 cups chocolate chips with the cup of butter. Do this 30 seconds at a time, stirring between each go, just until the chips are almost melted. Then stir briskly to finish the job.
  3. Stir in the sugar.
  4. Add in the eggs, one at a time, whisking well between additions. Make sure all the whites are incorporated well.
  5. Sift the cocoa powder into the batter. I don't have a sifter, so I used a colander instead and it worked wonderfully. I just tapped the side. I did it a little at a time, stirring now and then to get the cocoa mixed in well.
  6. Pour the batter into the prepared pan. Bake for 30 to 40 minutes, until the middle is just set. Remove from oven and allow the cake to cool for ten minutes.
  7. Carefully remove the sides from the pan and invert the cake onto a cake plate or stand. Allow the cake to cool completely.
  8. Now, prepare the icing. Melt the remaining 2/3 cup chips with the 3 Tbsp butter. Stir in the milk, honey, and vanilla.
  9. Pour the icing onto the cake, and, using a flat spatula, spread it over the entire top and down the sides of the cake.
  10. Let the cake sit a while to firm up. The recipe says to refrigerate it for a while, and you can, if you last that long.
  11. Savor it. Slowly.
  12. Put the rest in the fridge for later. :)

Menu Plan Monday 5/10 - 5/16

Last week went well. I stayed on my menu plan for the entire week, which is very rare around here. A few things we enjoyed this week:


Here's the plan for the week. Of course, it's all subject to change, but this is what I intend to make this week. I'm trying to get a jump on summer by making extra things to freeze. That way, there are fewer instances when I need to heat up my kitchen when it's really hot here in Georgia.

Breakfasts:
Lunches:
  • Egg Salad
  • Deviled Eggs, Cheese, and Raw Veggies
  • Dinner Leftovers

Dinners:
  • Steak, Smothered in Caramelized Onions; Corn on the Cob; Green Beans
  • Sausage & Cabbage; Lima Beans; Cornbread
  • French Onion Chicken in the Slow Cooker; Yeast Rolls; Collard Greens
  • Black-eyed Peas with Snaps; Fried Potatoes; Kale
  • Lima Bean Soup; Peasant Bread
  • Lentils & Rice with Tortillas and Salad
  • Black Beans & Rice with a fried egg on top; Tortillas; Corn; Salsa; Salad

Planned Snacks, Desserts, and other Baking:
For more tasty menu ideas, visit orgjunkie.com. See you throughout the week for some great recipes!

Sunday, May 9, 2010

I'm a Mom. And I'm Making My Own Breakfast Today.

My Mother's Day flowers from Picky Eater :)


Day 129.

Happy Mothers Day! It's tradition around the country that moms get a day off from housework and cooking today. You know: breakfast in bed, no dishes to wash, adorable, school-made crafts, and the like. But I love being in my kitchen, so today, I'm making breakfast. As usual.

(And what I really want for Mothers Day...what my heart yearns for...is a trip to the store to buy some bittersweet chocolate so I can bake a flourless cake this afternoon.)

For now, it's breakfast time. And breakfast at my house today is going to include sweet potato biscuits and green eggs. That is, eggs scrambled with spinach. They're both delicious, and eating them for breakfast gets you started on your day with a belly full of vitamins A, K, and C, protein, calcium, iron, folate, and more good for you stuff. So go do something good for yourself this Mother's Day. Go cook yourself this delicious, nutrient-packed breakfast. Or, have someone else cook it. Whatever you prefer.

Green Eggs
serves 4 to 6

What You Need:
  • 1 dozen eggs
  • 1/2 cup milk
  • 2 heaping cups full of fresh spinach
  • 1/2 a medium onion
  • 3 cloves of garlic, minced
  • 2 Tbsp butter
  • sea salt and pepper to taste
How it's Done:
  1. Melt butter in a large skillet.
  2. Meanwhile, finely chop the spinach and the onion. I did this in my mini chopper and it took seconds. Saute the spinach and onion in the melted butter for a few minutes. Add the garlic and saute another 30 seconds or so.
  3. Scramble the eggs with the milk and add them to the pan. Cook the eggs, stirring frequently and scraping the bottom of the pan. Salt and pepper the eggs to taste.

Sweet Potato Biscuits
Makes about 14 biscuits

What You Need:
  • 2 cups all-purpose flour
  • 1 Tbsp plus 1 tsp baking powder
  • 2 Tbsp sugar
  • 1/2 tsp salt
  • 1/3 cup butter, cut into small pieces
  • 1 cup cooked, peeled, and mashed sweet potato (1 large)
  • 1/2 tsp vinegar
  • 1 Tbsp milk
How it's Done:
  1. Stir together flour, baking powder, sugar, and salt.
  2. Cut in butter, just until it's in pea-sized bits and evenly disbursed throughout the flour mixture.
  3. Using your hands, add sweet potato to the dough, mashing and squeezing until the dough is all orange.
  4. Sprinkle on the vinegar and milk and incorporate it into the dough.
  5. Pat the dough into a rectangle 1/2" thick on a floured surface. Cut out biscuits with a biscuit cutter and place, sides touching, on a baking sheet sprayed with non-stick cooking spray.
  6. Bake at 425 degrees for 13 to 15 minutes. When they come out of the oven, you can drizzle the biscuits with a little bit of melted butter if you'd like.

Bites Around the Blogosphere

New here at All Home Cooking: Each Sunday, I'll be showcasing some of the recipes, articles, tips, and more I found throughout the previous week. I hope you'll find them useful and helpful and inspiring as I do.

This week's Bites Around the Blogosphere:

Quiche with Country Ham, Broccoli, and Swiss recipe from Andrea the Kitchen Witch. Sounds delicious and reminds me how frugal and easy quiches are. I need to make one. Soon.

Fresh Strawberry Cupcakes recipe from Beantown Baker: Boy do these look good and fresh! Perfect for a summer dessert!

article, "How to Eat Green without a Greenmarket," at Cheap Healthy Good: An informative article on eating well.

Steak, Anaheim Chile, and Scallion Tacos with Guacamole and Cojita Cheese recipe from For the Love of Cooking: Yum! I want to try this recipe. I love recipes with many complex flavors together vying for the top spot on my taste buds!

Gluten Free, Vegan Chocolate Cake recipe from Ginger Lemon Girl: Inspired me to make a flourless cake this week. Looks decadent. Check it out!

article, "Composting 101" (and check out 102 as well) from Girl Gone Granola: while I'm not ready to start composting this year (with a PCS -- military move-- in our very near future), this information was very helpful and I've stored it away for future use.

article, "Children and Technology," by I'm Not a Volcano: Her weekly Touchy Topic Tuesday posts are controversial and fun, and not to be missed.

Penne with Beef and Bell Pepper recipe at Jenn's Food Journey: Colorful. Pleasing to the eye as well as the palate.

Rhubarb Crunch Cake at Mennonite Girls Can Cook: This recipe made me jealous for rhubarb, so I went out and bought some and I'll be making pie with it this week.

Ham & Cheddar Waffles at Out of the Box Into the Kitchen: Got my wheels turning for other savory waffle combinations.

Homemade Toothpaste recipe at Wee Veg: Homemade. Toothpaste. Yeah. Love it.

Hide & Seek post at What Matters Most. Lovella is like a breath of relaxing, fresh air. Her blog is a wonderful, welcomed pause in my day.

If you visit any of these blogs, tell 'em I sent you. It's always nice to know where your traffic is coming from...and maybe they'll come visit me, too! :o)

Have a wonderful Sunday!

Saturday, May 8, 2010

To Your Health

Day 128.

I don't see how I'm going to get my kids to eat this.

It's not bad...it tastes like banana and coconut. But look at it. Look at it.

My goal is to get us all drinking some healthy smoothies regularly. This one isn't going to be one of the ones I offer my children. Look at it.

But if you're feeling brave, do try it. I made some modifications to the recipe that made it taste better. I like the taste. I'm sure the kids would like it as well. If it didn't look like...well...like it looks.

Weird Greenish-Brown Smoothie That Tastes Pretty Good
adapted from Squidoo Lens
What You Need:
  • 7 oz coconut milk
  • 5 oz flaked coconut (unsweetened)
  • 1 large banana, peeled and broken into several pieces
  • 1/2 cup frozen blueberries
  • 1 Tbsp coconut oil
  • 1/2 cup milk
  • 1/2 cup ice cubes
  • 1 Tbsp cocoa powder
  • 1 Tbsp honey
  • 1 Tbsp each wheat germ and flax meal
  • 1 1/2 cups raw kale
How it's Done:
  1. Combine all ingredients in a blender and puree several minutes. Serve immediately. Be brave.

Friday, May 7, 2010

Seeing Red?

Day 127.

 
Strawberries are in season in Florida, so here in Georgia, they're very inexpensive this time of year. In case you hadn't noticed, I've been on a strawberry kick this week. First, I made English muffins and topped them with homemade peanut butter and sliced strawberries. Then, I made strawberry pancakes. Today, I'm pleased to share with you a delicious summer thirst quencher: Strawberry Lemonade.

 
Strawberry Lemonade

 
What You Need:
  • 1 cup fresh lemon juice (It took me 6 large lemons to get this amount)
  • 1 lb fresh strawberries, cut into chunks and hulls removed
  • 4 cups water
  • 1 cup sugar or honey (honey would be wonderful, but I used sugar since it's cheaper)
  • optional: lemon slices and/or strawberries to float in the pitcher or glasses
How it's Done:
  1. Puree strawberries with lemon juice in your blender. 
  2. Stir together in a pitcher 2 cups warm water and the sugar until the sugar is dissolved. Blend in the other 2 cups of cold water and the strawberry-lemon puree.
  3. Store in the refrigerator until ready to serve. Float lemon slices and strawberries in the pitcher or glasses as desired.

Thursday, May 6, 2010

Part of This Complete Breakfast


Day 126.

I believe that commercials aimed at our children should be banned, particularly food commercials. I mean, Tony the Tiger: is he really going to come play soccer with my daughter if she eats his Grrrrrrrreat Frosted Flakes junk? No. Is Chuck E. Cheese really as awesome as its commercials make it out to be? Where a kid can be a kid? No. Where a kid can be a kid is in the backyard of his home, frolicking freely and using his imagination. Respect the pouch? What on Earth does Capri Sun mean by that high-quality bit of advertising? Respect it! How about that one where the Kool Aid man beats out the Soda man in the ballpark? As if Kool Aid is the healthier of the two? A full cup of sugar goes into those 8 servings of "fun!" Every glass is 1/8th of a cup of sugar! Who are they kidding? And then there's the McDonald's commercials that depict a mom gazing lovingly at her adorable, healthy weight child, who's not clamoring to be done with the fake food and go play on the playground that smells like sweaty feet.   

In a country where childhood obesity is all too common, what are we doing allowing these products to influence our children? And make no mistake: they do influence our children.

Back to the breakfast table: What is this "complete breakfast" that sugary cereals claim to be a part of? Generally, there's a brief picture showing us that the complete breakfast includes fruit, milk, juice, toast (usually buttered), and their sugary cereal. So the cereal is what? The dessert? I don't know about you, but I don't make a habit of serving dessert at breakfast. You?

I suppose cereals have their place in our lives. Just yesterday, I was eating a bowl of Honey Nut Clusters...for a snack. I did find myself curiously eying the flakes and wondering what they were at one time. I think we should always be able to recognize what we're eating. I'm not sure what I ate last night. I do buy cereals every now and again. Sometimes, even the sugary ones. But a complete breakfast they are not.

Strawberry pancakes with butter and honey drizzled on top, served with extra strawberries and a glass of milk on the side. Now there's a complete breakfast. You have carbs and fats and protein. And the pancakes will keep you fuller longer than the sugary cereal. Plus, they're very tasty.

Strawberry Pancakes
Makes about 12 pancakes

What You Need:
  • 2 cups flour
  • 2 1/2 tsp baking powder
  • 1/4 tsp sea salt
  • 2 Tbsp sugar
  • 2 eggs, lightly beaten
  • 2 Tbsp melted butter
  • 1 1/2 cups milk
  • 12 fresh strawberries, cut into thin rounds
How it's Done:
  1. Heat your griddle or pan to medium-high heat.
  2. Combine flour, baking powder, salt, and sugar. In a separate bowl, beat eggs with butter and milk.
  3. Add wet ingredients to dry, stirring just until combined.
  4. Drop by 1/4 cupfuls onto the hot skillet. Place sliced berries on top of each pancake. When the top side bubbles up, flip the pancakes and cook for another minute or two. Transfer to serving plate.
We ate ours with a bit of butter and honey.


Wednesday, May 5, 2010

Will Work for Peanuts

Day 125.

 
I found a really good deal on roasted peanuts the other day at a produce market. I can buy 50 pounds (yes, 50 pounds) of peanuts for $44. That's a lot of nuts. That's not a decision to be made whimsically, either. I had to sit down and calculate the cost, weigh the benefits, determine the workload involved, and decide whether I felt it was worth it.

 
(Don't hyperventilate just yet--- I only bought a 2 pound bag to begin.)

 
What would I do with 50 pounds of roasted peanuts?

 
I could split it with another family or two. Would any other family I know be interested in such a large amount of peanuts? No.

 
Okay. So it would be just us. Just the four of us. So what's the shelf life of roasted peanuts in their shells?

 
In the fridge, they'd keep for nine months. Could we consume fifty pounds of peanuts in nine months?
Think, think, think. Well, we consume at least 52 jars of peanut butter a year.

 
So if I made those fifty pounds of peanuts into peanut butter, we could definitely consume it before the nuts went rancid. But I don't have to turn them all into butter. What else could I use them for?

 
Cookies, peanut brittle, straight out of the shell, Thai recipes.

 
Monetarily, they're worth it. What about the effort of making peanut butter? I realize that there are many options for choosing healthy peanut butter. But it would cost so much less for me to make it myself. I wondered how long it would take to make a jar of peanut butter. So, I brought home a two pound bag of peanuts and set about the task of making peanut butter. The results were as follows:
  1. My hands and fingers were very sore by the end of shelling the two pound bag. 
  2. It took me over an hour, with help from my 11 year-old, to finish two pounds. 
  3. The peanut butter we made was beyond delicious. 
  4. We will make it again. And again. And again.
  5. So should you. At least once.

Homemade Peanut Butter
Makes about 2 jars' worth

What You Need:
  • 2 lb roasted peanuts in their shells
  • 2 tsp sea salt
  • 2 Tbsp honey (optional)
  • oil, added 1 Tbsp at a time, to reach desired consistency. We used 6 Tbsp oil. 

How it's Done:
  1. First, do all the hard work of taking the nuts out of their shells and skins. Removing the skins is easy on roasted peanuts. You just sort of pinch them and out they come. 
  2. Place peanuts, sea salt, and honey if using into your food processor. Turn on the processor. 
  3. Add oil, a tablespoon at a time, until the peanut butter is the right texture. It takes several minutes. 
  4. Store covered in the refrigerator. 
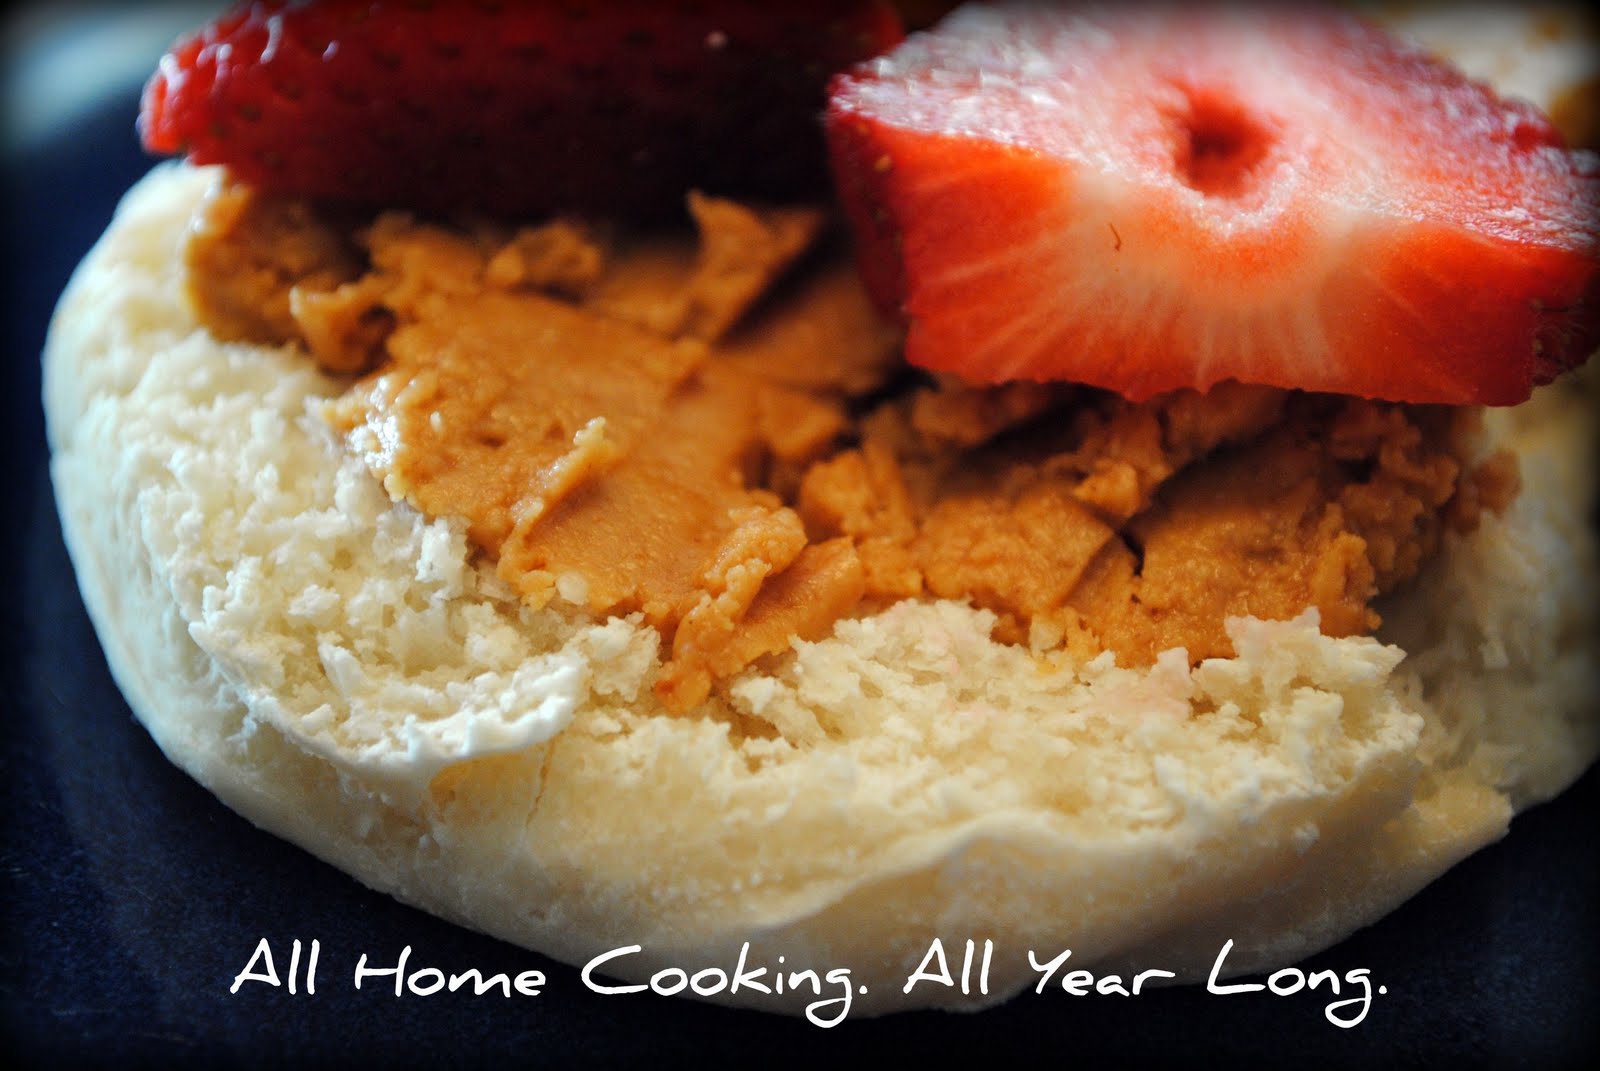
I served some for breakfast on homemade English muffins with slices of strawberries on top. Like a wholesome PB&J. :)

Tuesday, May 4, 2010

The Curveball Thrown to Me

Day 124.

Today, my husband announced that he wants to do Atkins to lose weight.

...

While I'm not willing to take that diet on for myself, I'm more than happy to help him out by preparing his meat-a-tarian meals, so we went to the produce market and to Publix for some (more) foods to get him started.

(for budget purposes I won't include his extra expenses from my blog totals for now. I may change this later.)

Now, I don't even particularly care for meat, and Picky Eater will only eat it when it's disguised as a taco, cheeseburger (sometimes), or a corn dog. Bayberry is a lover of meat, but will eat pretty much anything presented to her.

So now we have an almost vegetarian, a meatatarian ;), an omnivore who leans toward carnivore, and an omnivore who leans toward vegetarian. In one household. With one chef. Me.

This week's easy. I have simple recipes like tacos and burgers and chops and eggs planned. Those are all things easily adapted to the meatatarian Atkins way of eating.

But I'm still going to bake. I'm still going to serve bread. And I'm not willing to use artificial ingredients in any of it.

So this is going to be tricky.

But for now, please enjoy this lovely beverage on behalf of my husband. It has all sorts of things in it that are no-nos for Atkins followers, but things I deem pretty healthy, personally.

Icy Hot Chocolate
Serves 3 to 4

What You Need:
  • 2 cups of milk
  • 1/4 cup cocoa powder (dark is awesome)
  • 1/4 cup honey
  • 1 large banana, peeled
  • 2 cups of ice
  • a pinch of cinnamon
  • whipped cream for serving, if desired
How it's Done:
  • Combine all ingredients in a blender and blend for two minutes.
  • Pour into tall glasses and top with whipped cream.

Monday, May 3, 2010

Menu Plan Monday 5/3 - 5/9

Good Morning! It's raining very hard outside right now. I hope my poor plants survive this torrential downpour. :(

It's time for my weekly menu plan! Blue font indicates recipes I'll share with you throughout the week.

Breakfasts (Eggs are cheap this week):

  • Green Eggs & Sweet Potato Biscuits
  • Strawberry Pancakes
  • Veggie Scramble & Toast
  • Bacon &Egg Sandwiches
  • Smoothies & muffins
  • English Muffins with Peanut Butter
  • Scrambled Eggs & Toast
Lunches will be leftovers all week.

Dinners:
  • Smoked Sausage on buns with sauerkraut, pickles, baked beans, and fruit
  • Macaroni and cheese with fried green tomatoes
  • Soft tacos, spicy rice, and veggies
  • Burgers on potato buns with loads of veggies, fries, and icy hot cocoa
  • Pork Chops, collard greens, mashed potatoes, and fruit
  • Blackeyed peas with snaps and potatoes, cornbread, and pudding
  • Pizza and Strawberry Lemonade. Chocolate chip cookies for dessert.
I'm playing with lots of fun beverages this week: strawberry lemonade, icy hot cocoa, and two different  HEALTHY smoothies! Come back throughout the week for some great recipes. And while you're at it, visit org junkie for more menu plans and recipes.

Sunday, May 2, 2010

Grocery Shopping: May Edition

We did our monthly grocery shopping over the past couple of days and ended up with some great bargains. We bought some processed foods, which we are very much trying to get away from. However, in the end, the budget wins out and we make compromises. I came in under budget this month, which I needed to do in order to spend more on our garden (future grocery investment!), dentists, orthodontists, and car upkeep expenses. Here's what I have to work with in May, keeping in mind a mid-month trip which will add $40 to $60 more to my total for the month.

First trip: We found a meat market in town with really low prices when you buy their bulk packages. Here's what I got and what it cost me:

  • Large loaf of bread = $1.39
  • Cheapy white hot dog buns, 16 count = $1.39
  • 18 count eggs = $1.99
  • cookie dough, shrimp, corn, bread dough, and corn = $19.99 (big bags)
  • 5 lb roasted peanuts = $3.99
  • 10 lb potatoes = $3.99
  • Veggie special (5 lb each lima beans, blackeyed peas, snap beans, cut green beans, corn on the cob, creamed corn, broccoli) = $39.99
  • Super Special (6 large T Bones, 6 large Ribeyes, 5 lb center cut pork chops, 5 lb ground beef, 5 lb hamburger patties (all beef), 4 lb curly fries (junk, I know), 5 lb rind-on bacon, 5 lb chicken breast, 5 lb chicken wings, 5 lb smoked sausage, 4 lb chicken drumsticks) = $124.99
  • 3 lb collard greens = 3.99
Total spent at the meat market = $201.71

They have more meat packages that I'm thrilled about finding. Next month I'm going to expand my purchases there. If I buy several meat oackages, I'll have a greater variety and a few months' worth of meat in one trip.

Next trip was my post's commissary. I found a lot of clearance rack bargains today. Here's what I bought:

  • butter $1.29
  • sour cream $.95
  • cheddar and mozzarella, $2.50 each
  • hot dogs (junky ones) $.89
  • baking soda $.59
  • yeast = $1.29
  • toaster pastries by Fiber One (2 boxes) $3.00
  • unflavored gelatin, 2 boxes $2.10
  • shortening = $1.84
  • frozen coconut = $.89
  • confectioner's sugar = $1.59
  • granulated sugar = $2.38
  • all-purpose flour, 10 lb = $3.98
  • frozen blueberries = $1.79
  • strawberries, 2 baskets = $4.00
  • spinach = $1.65
  • 6 lemons = $2.34
  • cucumbuer = $.39
  • gren onions = $.44
  • flour tortillas = $1.09
  • 2 gallons of 1% milk = $5.00
  • 3 lb yellow onions = $2.99
  • vegetable oil = $2.79
  • coconut oil = $5.79
  • bottled water (ick) = $3.50
from the clearance rack (damaged packaging or discontinued items):
  • Honey Bunches of Oats cereal
  • diced tomatoes
  • chicken broth
  • cookies
  • cheese puffs (organic)
  • Spaghetti-Os
  • Excedrin
  • 2 cans of black beans
  • coconut milk
Total spent = $75.72 (includes surcharge)

Total spent on groceries for the month of May = $277.43 Not bad at all! I forgot cocoa powder and bananas, so I will need to return to the store for those some time during the week. In all, I'm pleased with my spending.

On our garden, we spent about $200 total for the season. I'm confident that we'll make that back. I already have 12 cherry tomatoes on my plant (they're all green still), my strawberries are blooming, my peppers are blooming, and my potatoes are going very well. Here's a list of what we've planted this year:
  • 1 cucumber plant
  • 1 broccoli plant
  • 4 bell pepper plants
  • 8 sweet banana pepper plants
  • 5 crookneck squash plants
  • a bunch of potatoes
  • 9 sweet potato plants
  • about 30 onion plants
  • 4 watermelon plants
  • 2 strawberry plants
  • 1 husky cherry red tomato plant
  • 1 Mr. Stripey tomato plant
  • 1 Taladega tomato plant
  • dill
  • basil
  • chives
  • thyme
  • parsley
  • rosemary
  • mint
Two questions for you readers: First, how do my local grocery prices compare to yours? And second, how are your gardens going?

*NEW!* Stay current on what's cooking!

Enter your email address:

Delivered by FeedBurner

LinkWithin

Related Posts with Thumbnails