Tuesday, June 8, 2010

If only I had cacao beans...


Day 159.

What says summertime better than S'mores? As far as I'm concerned, nothing! I have wanted to try my hand at marshmallow and graham cracker making for ages, and I've finally gone and done it. Those puffy cylinders at the grocery store and those sugary graham cracker stand-ins can't hold a candle to homemade. Sure, it looks delicious in my pictures, right? But is it worth YOUR time? I believe so. This is such a yummy, rewarding treat.

Be the cool mom on the block. Make your own marshmallows and graham crackers. And find some cacao beans and make chocolate bars. Just kidding.

Sort of.

I found my marshmallow recipe at The Hungry Mouse. Since I'm not in the habit of copying someone else's recipe verbatim, please go visit The Hungry Mouse for the actual measurements. I'll just give you a pictorial tutorial with my suggestions and opinions thrown in for good measure.

My chocolate graham cracker recipe is inspired by The Prepared Pantry. I changed it up a bit so I will list my recipe here. See The Prepared Pantry for original specifications.

Ready?

Here we go.

First, you will want to make your graham cracker dough. Stir together the following in a mixing bowl:

  • 1/2 cup all-purpose flour
  • 2 cups whole wheat graham flour (you can substitute whole wheat instead. graham is just a coarser grind)
  • 1/2 tsp sea salt
  • 1/2 tsp baking soda
  • 1/4 cup unsweetened cocoa powder
Set it aside for the moment. In your mixer bowl, beat 1 1/2 sticks of unsalted sweet cream butter until it's creamy.

Beat in 2/3 cup brown sugar and 1/4 cup honey. Next, mix in 1 tsp vanilla extract and 1 large egg.

Slowly stir in the dry mixture. You should end up with a firm, sticky dough. If it's too wet to make a ball, add a little more graham flour to the mix.

Move your dough to the fridge and let it chill for several hours to firm up.


Now it's time to start your marshmallows.

First, you mix your gelatin with your cold water in your mixer bowl and stir it up really well.

Don't smell it. Don't do it.

Next you prepare your pans for the marshmallow to set in. This is a very messy process so wear an apron and keep a cloth and broom handy. Sift powdered sugar onto your desired molds. I used a 10" square dish and a 9x11" rectangular dish. In retrospect, two 10" squares would have been better. My marshmallows would have been higher.


prepared pan for marshmallow fluff to turn into marshmallows

Then, it's time to make the sugar syrup. You'll need a tall pot, a whisk, a pastry brush, a bowl of cold water, sugar, corn syrup, a candy thermometer, and salt.

The Hungry Mouse says that you will need to brush sugar crystals from the sides of your pot. I never experienced much of that at all. Anyway, you will whisk together the water, sugar, salt, and corn syrup.


Then you need to clip on a candy thermometer. I have never owned one of these until this week. Trust me. Use it. What I thought was firm ball stage based on my perception was actually nearly 60 degrees colder than it needed to be! Use a thermometer. Here's mine:


Bring the sugar syrup to a boil and keep it there, on high heat, DON'T STIR, just leave it alone, until it reaches 244 degrees Fahrenheit. It takes longer than you think.


Remove it from the heat. Now, go see your gelatin. Stir it up. It will be dry-ish and chunky.

DON'T SMELL IT. DON'T. TRUST ME.

Put your splash guard on your stand mixer's bowl. Slowly pour the sugar syrup into your gelatin, with your mixer on low speed.


Even though you've now added your sugary goodness to the gelatin which you have not, to this point, sniffed,
DON'T SMELL IT. For the love of Pete, DON'T SMELL IT. You'll regret it and doubt your final product. Don't smell the stuff.

Now, set this to mix on medium-high for a full twenty minutes. Amazing things will happen. But for now, get back to your graham crackers.


Go get your dough. Divide it into three pieces to make your work easier. Roll each piece out onto parchment paper, to 1/4" thickness. Use a pizza cutter to cut squares/diamonds, but leave them all connected while they bake. Prick each piece with a fork several times. Slide your parchment onto a baking sheet and bake at 350 for about ten to twelve minutes.

Let them cool. They will still be soft when you take them out of the oven, but they'll harden up as they cool. Once cool, break them into pieces and enjoy!


Don't eat them all because we're making S'Mores, remember? Right about now, your marshmallow goo should look like pretty, shiny, puffy, white marshmallow fluff!

DON'T SMELL IT!


Instead, add your massive amount of vanilla extract (1/4 cup!) and beat it again for five more minutes.

NOW you can smell it. Go on. I know you're dying to smell it. Pour your fluff (well, scoop...or plop, or whatever) into your prepared pans.


This is a messy, messy process. You need lots of hot soapy water when you're done.


You think this is bad? you should have seen my fingers!

Now, dust the tops of your molds with powdered sugar and leave them alone for the night, uncovered, on your counter.

The next day, unmold your marshmallows. Use a sharp knife to cut around the edges of your pan. Lift the marshmallow up and out and only a clean surface for cutting. I cut mine into squares, You can do whatever you want. Dip the cut edges into more powdered sugar so they don't stick together.


Voila! Marshmallows!


Since I can't do it all ;) I bought some high-quality chocolate for my S'Mores.


Yum.

For more yummy recipes, visit Blessed with Grace for Tempt my Tummy Tuesday!

Welcome, New Friends!

Tuesday Tag-Along

It's time for Tuesday Tag-Along! If you're new to my blog, why not stop by and enter my giveaway for an Easy LunchBox System?

Without further ado...


Here's how it works:


Create a new Tuesday Tag-Along blog post. Include the Tuesday Tag-Along button by copying and pasting the code above. (You are also welcome to copy and paste these instructions in their entirety, or any portion of this Tuesday Tag-Along blog post!)

Add your blog name and the URL of your TTA post to the MckLinky below.

Follow Twee Poppets, the hostess blog listed in the first slot. Twee Poppets will follow you back! (Note: If you want Twee Poppets to follow you back, you MUST leave her a comment saying that you are a new follower and leave a link to your blog!)

If you can, please follow the blogs in the three slots before you (e.g., if you're number 20, follow numbers 19, 18, and 17). This is not mandatory, but it will help ensure that everyone who signs up gets a few new followers!


Follow as many other blogs as you want. The more you follow, the more that will follow you back! Be sure to tell them that you're following from Tuesday Tag-Along! You may also want to leave a link to your blog so they can return your follow more easily.

When you get a new follower through Tuesday Tag-Along, be sure to follow them back! It's just common courtesy. :)

The weekly Tuesday Tag-Along MckLinky opens every Monday night at 8:59pm Pacific Standard Time (that's 11:59pm Eastern Standard Time), and the TTA blog post will be posted well in advance of that time. The MckLinky will be open to add your blog until 11:59pm Tuesday night. You then have all week long to visit blogs and return follows!


There is a new list every week. The link you enter one week will not carry over to the next week's MckLinky. Please link up again each week to join in the fun!

Monday, June 7, 2010

CLOSED **GIVEAWAY** An Eco-Friendly Lunchbox System!

It's good sense to cook at home. It costs less. It's better for your body. And it's better for the environment, too. But what happens when you need to eat away from home?

Frugal-minded folks automatically think, "Well it's simple! Brown bag it!" Great idea. Except that it can be wasteful and add extra expense to your meals, as well as extra trash added to the landfill.

Enter Easy LunchBoxes. These handy gems are the green way to "brown bag" your lunch. By using one of these containers and the handy cooler, you eliminate the need for zip-top baggies AND the paper lunch sack. Score one for you, and one for Earth.


Recently, I won an Easy LunchBox System and Cooler and wrote about it here on my blog. My favorite thing about Easy LunchBoxes? They allow me to pack waste-free lunches for my children! I don't have to buy bags! I don't have to buy aluminum foil! At the end of lunch, there's nothing to be thrown away.

Even though school's out for the summer, we've been using our four containers each day. I make Snack Packs for my kids, which has been wildly popular around my house. And my kids can take lunch with them when we're on the go to the pool, the playground, the orthodontist..anywhere!

The containers are generously sized and are appropriate for kids and adults alike. The main compartment is big enough for a sandwich, and the two side compartments generously house most anything you can think to put in them. The cooler is big enough for a reusable beverage container, a cloth napkin, utensils, fruit...you name it..but not so big that it fe4els bulky to carry around.

Here are a couple of the things I've done with my set:


A salad that my daughter created, flat bread, grapefruit segments, and homemade vanilla pudding with sprinkles made a satisfying, "green" lunchbox for school lunch!


A Bento-style lunch without the rice: bunnies and butterflies, leaves and trees, swirly carrot "flowers" and yummy strawberries made this On the Go meal for my daughter.


Fresh watermelon, Greek yogurt with fresh blueberries, and a candy necklace kit. A Snack Pack for a busy summer day!

What would you do with an eco-friendly lunchbox system like this?

Kelly Lester, the owner of Easy LunchBoxes, has generously provided a set of FOUR Easy LunchBox containers and ONE cooler to one lucky reader here at All Home Cooking. All Year Long. I'm so excited for one of you to get the opportunity to try this set out for yourself!

Here's how to enter:


#1. MANDATORY ENTRY: Visit EasyLunchBoxes.com. Leave a comment here telling me what you like best about Easy LunchBoxes. INCLUDE YOUR EMAIL ADDRESS IN YOUR COMMENT.


Other entry opportunities (LEAVE SEPARATE COMMENTS FOR EACH ENTRY):


#2. Visit the photo gallery of yummy lunch possibilities. Leave a comment telling me which one looks yummiest to you. INCLUDE YOUR EMAIL ADDRESS IN YOUR COMMENT.


#3. Follow BOTH Easy LunchBoxes AND All Home Cooking. All Year Long. on Twitter. Leave a comment with your Twitter. Leave a comment with your Twitter name and let me know you're following. INCLUDE YOUR EMAIL ADDRESS IN YOUR COMMENT.

#4. "Like" BOTH Easy LunchBoxes AND All Home Cooking. All Year Long. on Facebook. Leave a comment letting me know you have clicked LIKE on both. INCLUDE YOUR EMAIL ADDRESS IN YOUR COMMENT.


Here are the rules:
  1. One winner will be chosen from all entries via Random.org and will receive a set of FOUR Easy LunchBox containers and lids and ONE lunch cooler in winner's choice of color (chosen from black, dark red, olive, aqua, or purple).
  2. Sorry, folks, but this giveaway is limited to folks in the United States and Canada.
  3. You cannot have won an Easy LunchBox system in the last three months.
  4. You MUST include your e-mail address in your comments.
  5. All entries will be verified.
  6. Random drawing will be held FRIDAY, JUNE 11th, 2010, shortly after 10:00 a.m. Entries must be in by 9:59 a.m Eastern time on Friday.
  7. Winner will be notified by e-mail and announced on this blog. Winner will have 48 hours to write back or an alternate winner will be drawn.
Good luck! :)

Menu Plan 6/7 - 6/13


It's seriously summertime here in western Georgia. This weekend, I spent too much time in the sun without drinking enough water and made myself feel unwell. So I want to remind you to drink enough water this summer! If you don't like the flavor of plain water, why not mix it up a little? Adding lemon slices, lime slices, fresh mint, slices of ginger, or slices of cucumber can help freshen up your water, and maybe help you increase your water intake.

Here are a few of the things we enjoyed last week:


Our weekly menu includes all three meals to keep me on track now that the kids are out of school for the summer. I don't stick to my plan all week, but it gives me a good guideline so that I don't run out of ingredients.

Monday 6/7

Breakfast: Overnight Oatmeal (For my husband: Boiled Eggs)
Lunch: Noodle Soup and Grilled Cheese on Rye (Tuna Salad for my husband)
Dinner: Black Bean & Sweet Potato Enchiladas with Salad (For my husband: Bunless Burgers with Fresh Veggies)


Tuesday 6/8

Breakfast: Scrambled Eggs with Cheese
Lunch: Lentils & Rice served on salad (For my husband: Tuna Salad)
Dinner: Whole Wheat Penne with Garden Fresh Tomato Sauce; Breadsticks; Peas (For my husband: Grilled Chicken Salad)


Wednesday 6/9

Breakfast: Breakfast Pizza (Eggs for husband)
Lunch: Happy Little Bentos (Chicken Salad for my husband)
Dinner: Vegetarian Taco Potatoes; Corn on the Cob; Tomato-Onion Salad (For my husband: Peanut Butter Chicken & Green Beans)

Thursday 6/10

Breakfast: "Soaked" Pancakes with real maple syrup (Eggs for husband)
Lunch: Oat Burgers on Sweet Potato Rolls (Bunless Bugers for husband)
Dinner: Mini Pot Pies & Salad (Taco salad for husband)

Friday 6/11

Breakfast: Peanut Butter Breakfast Cookies (Eggs and Nuts for husband)
Lunch: Fried Rice (Chicken & Veg stir-fry for husband)
Dinner: Pizza (Pizza Burger for husband)

Saturday 6/12

Brunch: Quiche made from whatever needs to be used up; fresh fruit (Eggs for husband)
Dinner: Burrito Pockets & Creamed Corn (Taco Salad for husband)
Dessert: S'mores

Sunday 6/13

Breakfast: Baked Donuts (Eggs for husband)
Lunch: Leftovers
Dinner: Loaded Nachos (Hot Wings for husband)
Dessert: No Bake Cookies


How's your garden doing this week?

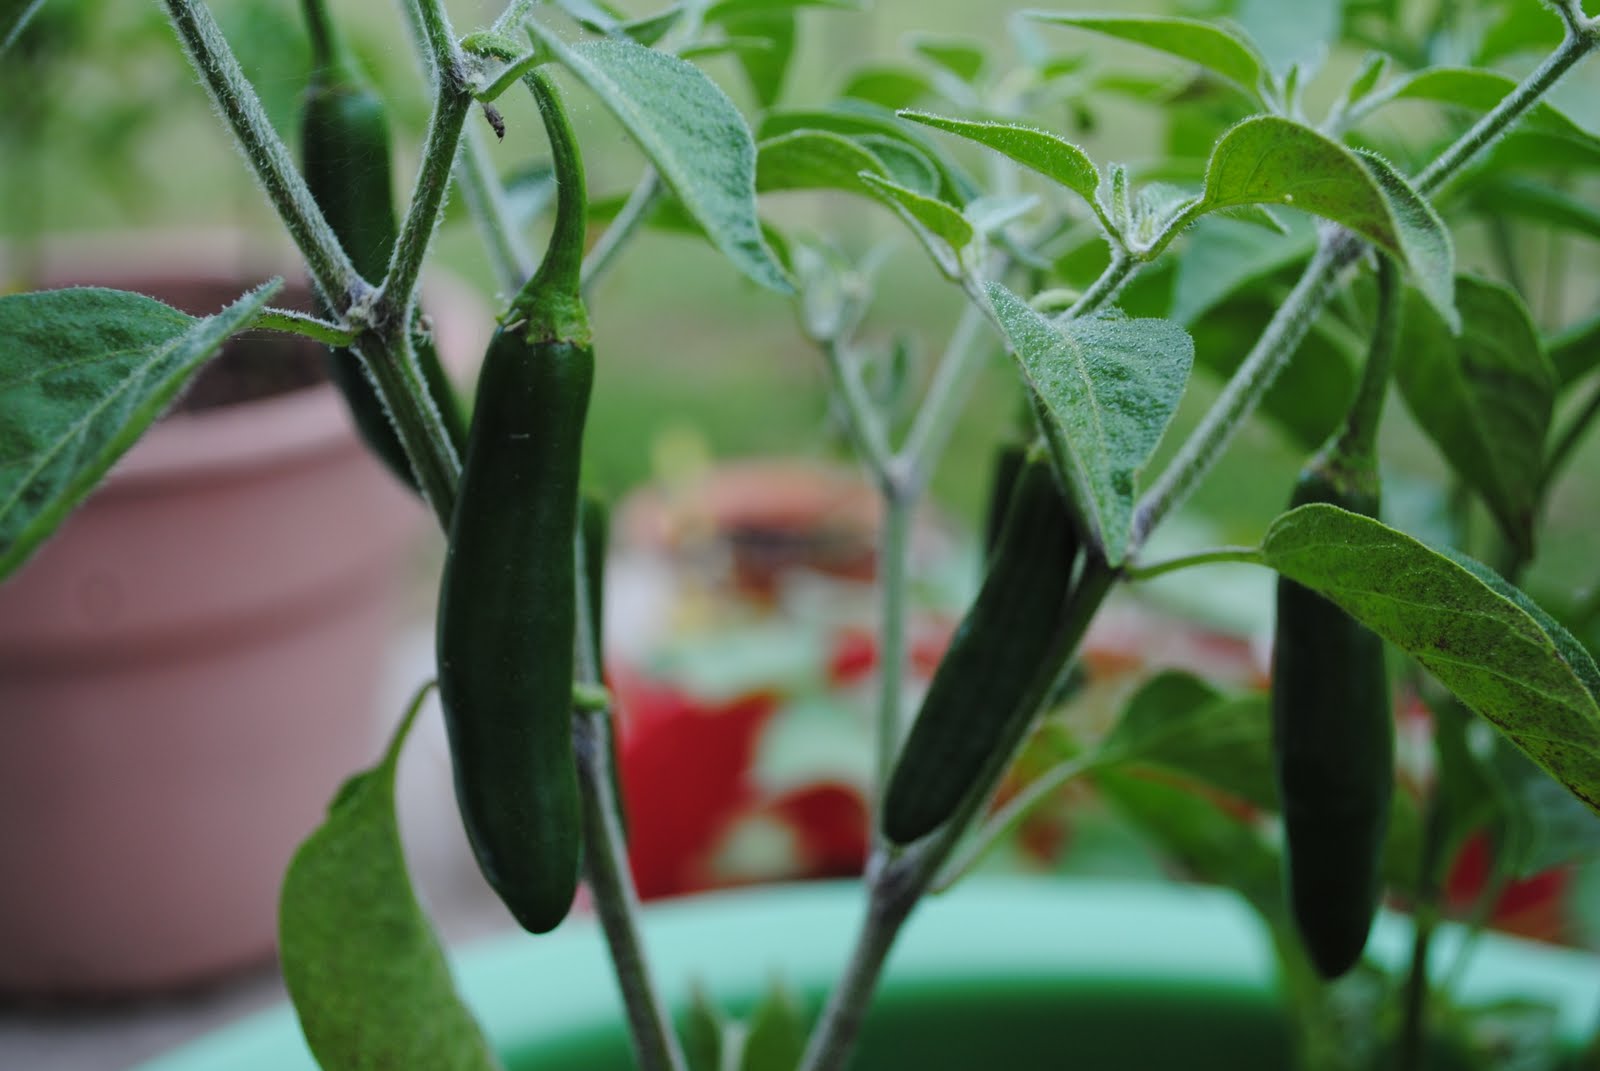
Ours is doing very well! We figured out what was eating our pepper and tomato plants and have been working to fix the problem. This week, ladybugs, dragonflies, and spiders have all come to live and dine in our garden, and we couldn't be happier about it. Our peppers are thriving now. Take a look!


Some cayenne peppers


Jalapeno peppers


Serrano peppers


Sweet Banana Peppers. We are producing so many of these that we can't eat them fast enough. While I could freeze them for later use, I opted, instead, to share the bounty with a neighbor, who was very appreciative. I was able to snip almost a dozen peppers to share with her yesterday!


Tomatoes! This is the red variety. Our Mr. Stripey plant is finally producing and will hopefully have photo-worthy fruit next week.


Okra :) We planted this just for fun. We only have one okra plant so we won't be feasting on okra this summer, but it's been fun to watch it grow!

Our one broccoli plant has finally begun to flower. Our one cucumber plant is spreading out. Our onions are doing very well. And our kiddie pool watermelon? Well...

...it's growing nicely and producing lots of blossoms. I can't take a clear enough picture of it, but we have several itty bitty baby watermelons among all those leaves!

For more menu plans to inspire your cooking this week, visit Menu Plan Monday at I'm an Organizing Junkie.

Oh! While you're here, why not stop by and enter my giveaway? And don't forget to drink your water!

What's on your menu plan this week? How do you remind yourself to drink water?

Sunday, June 6, 2010

This is So Simple...


Day 157.

This "recipe" is so simple that I feel as though I'm cheating you by posting it here. So make me feel better by commenting. Is this a new idea to you? Have you done this before? =D

Taco Potatoes
Serves 4

What You Need:
  • 4 baking potatoes, scrubbed clean and pricked with a fork several times
  • 1 lb ground beef (or ground turkey, ground chicken, ground bison, or tempeh, or beans, or...)
  • 2 Tbsp all-purpose flour
  • 1 Tbsp chili powder
  • 1 tsp ground cumin
  • 1 tsp sea salt
  • 1/2 tsp black pepper
  • lettuce, tomatoes, green onions, salsa, sour cream, and cheese to top as desired
How it's Done:
  1. Bake your potatoes. My microwave makes this easy work, but you could do it the long way in your oven if you prefer.
  2. Brown your meat. Or heat your beans or tempeh (tempeh, to the uninitiated, is fermented soybean cake. Don't let the name throw you off -- it's delicious. Try it at least once!)
  3. Drain your meat, then toss it with the flour and spices.
  4. Cut open a potato and top it with taco seasoned meat and whatever your heart desires.
It's filling. It's pleasant to look at. It's cheap. It's homemade. The kids like it. It's a winner at my house.

PS...Don't forget! 7 a.m. (-ish...I have one kid going to VBS and the other to the orthodontist, so hang in there!) my first giveaway of the summer will be announced! Be there!

Saturday, June 5, 2010

An Announcement! And Bites Around the Blogosphere

***ANNOUNCEMENT***
There's a giveaway coming! Be here Monday morning, June 7th, to find out what it is. It's going to be great!

And now, onto Bites Around the Blogosphere. I really want to make a button for this. I have button frustration. Yes, I know there are people I could pay to make a button for me, but I'm just not ready to pay for a graphic for this blog. I'm still trying to figure it out for myself. If only I knew how to decipher those html codes...

Every week, I like to share with you some of the yummy-looking recipes that I come across on my Blogger Dashboard Reading List. Usually, I post this list Sunday mornings, but I was never any good at waiting. ;)

Here they are for this week:


And just for fun this week, here are a few great giveaways you can enter! Note that I'm not affiliated with any of these sites; I'm just listing them here for your enjoyment. :)

Sour Cream Potato Rolls


Day 156.

We had such a great time today! We took the kids to Fun Fest, a carnival hosted by a local church. Everything was free: rides, games, inflatables, food (Chic Fil A was one sponsor), drinks, sno cones, cotton candy, door prizes, entertainment...everything was free. No catch.

Next, it was off to the National Infantry Museum to visit the traveling Vietnam Memorial Wall. We went from fun and uplifting to somber and humbling. The number of names on that wall.... it saddens my heart. If you have a war veteran in your life, hug him. If you know someone who has their name on a memorial wall, please except my sincere sorrow and gratitude for selfless service.

I've lived in western Georgia for exactly a year now, and I've learned that there are plenty of family-friendly free events to keep a family busy and entertained all summer long. As a housewife on an enlisted soldier's salary, I surely appreciate that. Sometimes, the free events are purely fun and entertaining. Sometimes, they're learning opportunities. They are all life-enriching, and they're all free. Who needs theme parks? Be a hometown tourist this summer. You'll reduce your expenses, increase your local awareness, and reduce your carbon footprint in the process. ;)

 
If your local fun involves cook-outs or barbecues, you'll need some bread. Here's a fabulous, simple, tasty recipe to get you started.
 
Sour Cream Potato Rolls

 
What You Need:
  • 1/2 cup warm milk
  • 1/2 cup granulated sugar
  • 1 package (2 1/4 tsp) active dry yeast
  • 6 Tbsp melted butter
  • 1/4 cup sour cream
  • 2 eggs
  • 1 cup mashed potatoes
  • 1 tsp salt
  • 4 to 5 cups all-purpose flour
  • flour for dusting rolls
How it's Done:
  1. Combine warm milk, sugar, and yeast in a mixing bowl. Stir until sugar and yeast are dissolved. Add melted butter and sour cream. 
  2. Add eggs, one at a time, beating well after each addition.
  3. Sit in mashed potatoes and salt.
  4. Gradually stir in flour until your dough pulls away from the walls of the bowl.
  5. Turn out onto a floured surface and knead six to eight minutes, until smooth and shiny.
  6. Move dough to a well-greased bowl. Cover and let rise in a  warm place until doubled in size (about an hour).
  7. Punch down the dough. Divide into 10 to 12 pieces. Roll each piece into a ball, then roll the ball in flour and place on a greased baking sheet. Cover and let rise 30 minutes or so, until doubled in size.
  8. Bake at 400 degrees for about 15 minutes, until the rolls sound hollow when tapped.

Friday, June 4, 2010

Welcome New Friends!

The Girl Creative

Day 155.

I'm participating in a few blog hops today to mingle with other bloggers. If you're here from one of them, welcome! If you're a regular reader, I appreciate you so very much! There's a new recipe at the bottom of this post for you.

New here? Hungry? Here are a few of my recent favorites for you to try...


There's tons more here, so pull up a chair, make yourself at home, and find something good to eat. Thanks for stopping by!

Quinoa* Breakfast Cereal
What You Need:
  • 1 cup cooked quinoa
  • 1 cup milk (I used almond milk)
  • 1 Tbsp honey
  • 2 Tbsp chopped dried fruit (I used figs)
  • 2 Tbsp chopped nuts (I used walnuts)
  • 1 tsp ground cinnamon
  • 1/2 cup fresh fruit (I used blueberries)
How it's Done:
  1. First, you'll need to prepare your quinoa. Rinse it well, then bring to a boil and simmer as package directs. One cup of quinoa and two cups of water will give you roughly 3 cups of cooked quinoa.
  2. Next, combine cooked quinoa with the milk, honey, dried fruit, nuts, and cinnamon. Simmer until thickened, about ten minutes.
  3. Remove from heat and stir in fresh fruit.
*Quinoa is a delicious grain that I would describe as nutty in flavor. It's very healthy and readily available online and in whole foods/health foods stores.

Thursday, June 3, 2010

Yet More Peachy Goodness

Day 154.

 
I'm still peach wealthy. I've frozen two bags of peach pie filling and five jars of peach jam. This morning, I used eight more peaches to make some peach sorbet, and I still have more than a dozen peaches remaining.

This sorbet is delicious. Rich in flavor but light and smooth in your mouth, fragrant and delicately spiced, it's unlike anything you'll ever find at your local grocery store.

Peach Sorbet

What You Need:
  • 8 ripe peaches, pits removed (peeling is optional)
  • 1/4 cup honey
  • 1/2 cup apple juice
  • 1/2 tsp ground cinnamon
  • 1/4 tsp ground cloves
How it's Done:
  1. In your blender, puree all the ingredients until you're left with a smooth liquid. If you opt to leave the peels on, be sure the peels are tiny flecks in your blender.
  2. Process according to your ice cream maker's instructions. I use the ice cream attachment for my KitchenAid stand mixer and it took 20 minutes to freeze. 
  3. Move to storage container, seal tightly, and freeze at least two hours longer before serving. 

Want more yummy recipes? Visit Sandra at Diary of a Stay at Home Mom and get more, or link up your own dish today!

Wednesday, June 2, 2010

Works for Me Wednesday: Snack Packs

It's summertime. The kids are out of school, playing hard, sweating, coming in and going out my back door and my front door all day long/ They're building forts and tearing them down. They're swimming and slip 'n sliding and sprinkler splashing and puddle stomping.

And they're hungry.

All. The. Time.

I found something that works for me.

I make snack packs for them to eat between lunch and dinner. This eliminates the following:
  • "Can I have a snack?" --> The kids know that they can have whatever they'd like from their snack pack, at whatever time they need a snack.
  • Standing at the fridge with the door wide open. --> They simply grab their snack pack and close the door. They choose their item(s) and put the snack pack back in the fridge. Less electricity wasted.
  • Eating too much junk. I treat kids' meals and snacks this way: I will decide what to serve you. You will decide how much and when to eat it. By packing snack packs for the kids, I am giving them choices that I approve of.
  • Being wiped out of the "good" snacks on shopping day. --> I don't know about you, but my kids eat about six snacks per day on an active day. SIX SNACKS! EACH! The "good" snacks include freshly baked cookies, purchased fruit leathers, and anything that might remotely be considered junky. If allowed, they would devour those before reaching for fruits and healthier alternatives. By packing Snack Packs, I'm rationing the junk. Better for my wallet, and better for their bodies.
  • The hassle of preparing snacks throughout the day. --> Like I said, they eat a lot. Preparing snack packs takes about five minutes of my day, all at once, instead of having to prepare snacks all throughout the day.
And finally, the Snack Packs let my kids have control over their snacking. The first day I did this, Picky Eater ran out of food in her Snack Pack halfway through the day and was upset. I gave her extras, but I've told the kids that once it's gone, it's gone. The Snack Pack is meant to carry the kids over from lunch until dinner. Every day since then, it has done just that. Here are some example Snack Packs I've made the kids:


watermelon, strawberry Greek yogurt with fresh strawberries added, and Snapea Crisps

Jammy Sammy, two sandwich cookies, Pocky (yes, a junky Snack pack on this day!), applesauce, and a large strawberry

Watermelon, Blueberry Greek yogurt with fresh blueberries on top, and a candy necklace kit.

What's for Lunch Wednesday: Sweet Potato Pancakes

Day 153.

If you've been reading this blog for long, you know that I'm a proponent of healthy school lunches and that I am appalled at the lack of quality available to most American elementary school students in their cafeterias. Also, it's my goal to reduce the amount of garbage my family produces, so I've decided to make all of their school lunches no waste meals.

When I came across this bento-themed meme at What's for Lunch at Our House, I knew I would participate. So here's what's for lunch at our house.

Main compartment: Romaine lettuce, carrot curls, cucumbers cut into butterflies, strawberries and white cheddar cheese cut into bunnies, and a hard-boiled egg molded into a bunny shape.
Sides: strawberries cut to fit compartment; sweet potato pancakes in leaf and tree shapes.

Not pictured: salad dressing and honey-cinnamon butter

Time invested: 20 minutes (plus boiling time for eggs---pancakes were leftovers)

 The sweet potato pancakes I made were a healthy version of a Southern classic. I omitted the eggs and butter, replacing them with banana and applesauce, eliminated added sugar, and opted for almond milk instead of cow's milk.

Sweet Potato Pancakes with Honey-Cinnamon Butter

What You Need:
  • 1 sweet potato, cooked, peeled, and mashed
  • 1 large banana, peeled and cut into chunks
  • 1/3 cup applesauce
  • 2 cups milk (I used almond milk...feel free to use whatever milk you prefer)
  • 1 2/3 cups flour (I used all unbleached white flour, but you can substitute whole wheat for even healthier pancakes)
  • 1 Tbsp ground cinnamon
  • 1 tsp ground nutmeg
  • 1 Tbsp plus 1 tsp baking powder
  • non-stick cooking spray for the pan

 
How it's Done:
  1. Preheat your griddle or skillet on medium heat.
  2. In a food processor, or using a mixer, beat sweet potato with banana and applesauce. Add milk slowly and beat to combine.
  3. In a separate, large mixing bowl, combine flour, cinnamon, nutmeg, and baking powder.
  4. Add liquid to dry ingredients, stirring only long enough to make sure all the dry ingredients are wet.
  5. Drop by 1/3 cupfuls onto a greased skillet and cook 3 minutes on first side, flip, and cook until done (about 3 more minutes).
  6. For the butter: In a food processor, combine 1 1/2 sticks unsalted butter with 1/4 cup honey and 1 Tbsp ground cinnamon. Process until combined. Store in refrigerator.

Tuesday, June 1, 2010

Even More Peaches!

Day 152.

I still have peaches left over from my recent purchase of 25 pounds of them. And I'm tempted to go back for more from my farmer's market.

Today, I peeled and cut them into slices for future use in recipes. More specifically, I'm putting these up for future pies. While I would prefer to pack them dry, I want to avoid freezer burn and keep them in good condition, so I'm packing them in a light sugar syrup. And that works out well for pie peaches. Here's how it's done:

You will need:
  • 8 peaches for each future pie (I'm making enough for two future pies)
  • 2 cups of sugar
  • 6 cups of water

Step 1: Prepare the sweetener liquid.


I used plain sugar. Heat 6 cups of water on the stove. Slowly add 2 cups of sugar, stirring constantly, until all the sugar is dissolved. Let this solution cool completely before you add the peaches.

Step 2: Prepare the fruit.

Bring  a pot of water to a boil. Drop peaches in gently and let them boil for 30 to 45 seconds.


Remove with a slotted spoon and immediately submerge the peaches in an ice water bath. Leave them there for a few minutes.


The skin will now slide off easily. Cut off any bruised portions.


Cut the peaches into slices or halves, whichever you prefer. Sprinkle the slices or halves with lemon juice or Fruit Fresh to help them maintain their color.


Step 3: Combine the fruit with the sweetener.


Fill your freezer bags or containers. If using containers, leave 1/2" head space. If using freezer bags, be sure to squeeze out as much air as possible before sealing.


Step 4: Label and freeze.


Enjoy the fruits of your labor all year long!

Tuesday Tag-Along

Tuesday Tag-Along

I so enjoy this Tuesday meme. It gives me the chance to find new blogs that I would have otherwise probably never discovered. I was leary at first, because it felt an awful lot like begging for followers, but it's become a fun game for me to find some fantasic new blogs and learn new things. I've found new foodies, lots of gifted crafters, and some witty humor as well. Won't you join me?


Here's how it works:


*Click on the banner above.

 
*Create a new Tuesday Tag-Along blog post. Include the Tuesday Tag-Along button by copying and pasting the code above. (You are also welcome to copy and paste these instructions in their entirety, or any portion of this Tuesday Tag-Along blog post!)


*Add your blog name and the URL of your TTA post to the MckLinky at Twee Poppets.


*Follow Twee Poppets, the hostess blog listed in the first slot. Twee Poppets will follow you back! (Note: If you want Twee Poppets to follow you back, you MUST leave her a comment saying that you are a new follower and leave a link to your blog!)


*If you can, please follow the blogs in the three slots before you (e.g., if you're number 20, follow numbers 19, 18, and 17). This is not mandatory, but it will help ensure that everyone who signs up gets a few new followers!


*Follow as many other blogs as you want. The more you follow, the more that will follow you back! Be sure to tell them that you're following from Tuesday Tag-Along! You may also want to leave a link to your blog so they can return your follow more easily.

 
Have a great day!

*NEW!* Stay current on what's cooking!

Enter your email address:

Delivered by FeedBurner

LinkWithin

Related Posts with Thumbnails